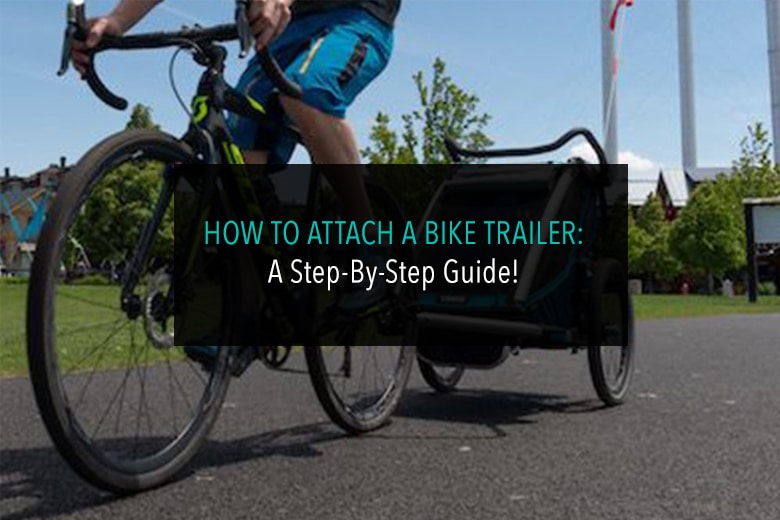
Cycling is a great activity and one of the best parts about it is that everyone can do it! You can even include the kids or the pets if you need to! Bike trailers are the perfect way to make this happen.
Here are some simple steps for attaching a Bike Trailer to your bike:
Seat Post Attachment:
- Install the receiver onto the seat post.
- Replace Bike Seat
- Attach the Trailer Hitch to the Receiver
- Attach the Safety Strap
- Rear Axle Attachment:
- Remove Rear Axle
- Attach Receiver to Axle
- Attach Trailer Hitch to the Receiver
- Attach Safety Strap
Those are the basic steps for attaching your bike trailer, to get a little more detail, keep on reading.
Types of Hitches
There are different types and styles of bike trailers making it easy to find one to fit your needs exactly. That being said, each trailer will probably hitch to your bike in a slightly different way. This article will cover the two most common hitch styles that you will find.
Trailers that you see attached to bikes may all look very similar, but they will often serve different purposes. The three most common types of bike trailers are trailers for children, trailers for pets and trailers for cargo.
Depending on the type of trailer you have, the setup will vary. The method of attachment will also vary by brand and model.
Where Does My Hitch Attach
The two main types of hitches will attach in these ways.
- Attach at the axle of the rear tire.
- Attach at the seat post of the bike.
You should quickly recognize where your bike trailer will attach by the shape and angle of the arm protruding off the front of the bike trailer.
If the arm of the bike trailer is attached to a corner rather than in the middle of the trailer frame, it is most likely going to attach at the axle of your bicycle.
If the protruding arm connects at the center of the trailer frame and is angled upwards at a curve, you will know that it will connect to the seat post of your bike. The curve of the connecting arm will reach over the bicycle tire to connect to the post.
Once you have identified where the trailer will attach to, you are ready to begin connecting the trailer to the bike.
Attaching to the Seat Post
Attaching a trailer to the seat post is often times quite simple, the only place you may run into trouble is if you are missing a part or if you don’t have the correct sizes of parts. Here we go!!
1. Install the receiver onto the seat post.
The receiver is the part that will stay on your bike post, ready to be hooked to the bike trailer at a moments notice. Often, the metal reliever will be too big for your seat post.
All seat post trailers should come will come with little circular plastic pieces that vary in size that go in between the seat post and the receiver to make for a snug fit.
If you don’t have any of these small plastic pieces, (that look like small lengths of plastic pipe) you can easily stuff some cardboard or cloth in between the seat post and the receiver for a make-shift fix.
2. Replace Bike Seat
Once the receiver is attached tightly on the seat post, you can re-attach the bike post onto the bike, and tighten the seat at the desired height.
3. Attach the Trailer Hitch to the Receiver
Now you can look at the hitch attached to the trailer arm and see that the piece on the end should connect onto the receiver on the seat post.
Once you Fit the trailer hitch into the receiver you should notice that there are holes on both sides (or on top and bottom) of both the trailer hitch and the receiver. When the hitch is connected with the receiver, the holes should all line-up, creating a clear line of sight through the two.
These holes are designed for the quick-release pin. The quick release pin allows for the trailer to be taken off and put back on easily.
Insert the quick release pin through the top until it shows through on the bottom. The end of the quick release pin should have a hole running perpendicular to the pin. The hole is for a clip to be placed so the pin cannot jerk out because of bumpy terrain or vibration.
If there is no hole for a safety clip, you model may call for a washer and a nut to screw on to the pin to hold it in place
4. Attach the Safety Strap
Some models will come with a safety strap that is attached to the arm of the trailer that should be wrapped around the seat post and clipped on to the arm as a safety precaution. That way if the hitch detaches, the safety strap will keep the trailer from disconnecting from the bike.
If your model does not have this feature, you can improvise with a length of chain or a piece of rope secured to the arm of the trailer, wrapped around the seat post.
5. Test Drive
Before you go out for a long ride, especially with your kids or a pet, make sure that everything is in working order by taking it out for a quick spin before you hit the open road.
Rear Axle Attachment
For those of you with the rear axle attachment, the connection of the trailer to the bike is fairly simple, the most difficult part is connecting the receiver to the axle. No fear, we’ll talk through this step by step.
1. Remove Rear Axle
For older bikes, you will need a wrench to loosen the rear tire from the frame. You will not want to take the tire completely away from the frame as you will quickly tighten it back on. You will have to remove the axle from the rear wheel
It is very simple, you will need to loosen the nut all the way until it is off of the axle. Once the nut is off, pull the axle out of the tire.
Now you will take your washer and the receiver and slide the axle through both pieces. Once both pieces are on the axle, insert the axle back through the wheel and tighten the wheel back onto the frame.
Don’t worry, that was the hardest part!! 🙂
2. Attach the Trailer Hitch to the Receiver
Now you will want to bring the trailer into position and insert the trailer hitch into the receiver.
Some models will have the trailer arm curve to the correct angle, other models will have the trailer hitch on a strong spring that will give stability to the trailer.
The hitch will fit tightly into the receiver and may require some strange to get it in all the way.
You will notice two holes on both sides of the receiver and the trailer hitch. All of these holes will line up so a pin can lock the hitch and receiver together.
[amalinkspro type=”showcase” asin=”” apilink=”https://www.amazon.com/dp/B0771NDGHF/ref=as_li_ss_tl?psc=1&pd_rd_i=B0771NDGHF&pd_rd_w=0OHc6&pf_rd_p=45a72588-80f7-4414-9851-786f6c16d42b&pd_rd_wg=Nkg1O&pf_rd_r=3KGEHS6E8ASXJHBSNP6A&pd_rd_r=56cdeb54-5eb8-4522-afe8-c226405052fa&spLa=ZW5jcnlwdGVkUXVhbGlmaWVyPUEyQURYUTQ3TE9MV1FBJmVuY3J5cHRlZElkPUEwMzI2ODk3S0VJNlZRSkk0NVA3JmVuY3J5cHRlZEFkSWQ9QTA0MTI5MjExQUcxVjdJREM3MUlDJndpZGdldE5hbWU9c3BfZGV0YWlsJmFjdGlvbj1jbGlja1JlZGlyZWN0JmRvTm90TG9nQ2xpY2s9dHJ1ZQ==&linkCode=sl1&tag=dragonpoh-20&linkId=469c93ea4a0a729b75dd8178a391887e&language=en_US” new-window=”true” addtocart=”false” nofollow=”true” sc-id=”4″ imgs=”%3Ca%20href%3D%22https%3A%2F%2Fwww.amazon.com%2Fdp%2FB0771NDGHF%2Fref%3Das_li_ss_il%3Fpsc%3D1%26pd_rd_i%3DB0771NDGHF%26pd_rd_w%3D0OHc6%26pf_rd_p%3D45a72588-80f7-4414-9851-786f6c16d42b%26pd_rd_wg%3DNkg1O%26pf_rd_r%3D3KGEHS6E8ASXJHBSNP6A%26pd_rd_r%3D56cdeb54-5eb8-4522-afe8-c226405052fa%26spLa%3DZW5jcnlwdGVkUXVhbGlmaWVyPUEyQURYUTQ3TE9MV1FBJmVuY3J5cHRlZElkPUEwMzI2ODk3S0VJNlZRSkk0NVA3JmVuY3J5cHRlZEFkSWQ9QTA0MTI5MjExQUcxVjdJREM3MUlDJndpZGdldE5hbWU9c3BfZGV0YWlsJmFjdGlvbj1jbGlja1JlZGlyZWN0JmRvTm90TG9nQ2xpY2s9dHJ1ZQ%3D%3D%26linkCode%3Dli2%26tag%3Dcewebproperti-20%26linkId%3D8cd540dbab0e2aaf6bf9cd6a659ecfc1%26language%3Den_US%22%20target%3D%22_blank%22%3E%3Cimg%20border%3D%220%22%20src%3D%22%2F%2Fws-na.amazon-adsystem.com%2Fwidgets%2Fq%3F_encoding%3DUTF8%26ASIN%3DB0771NDGHF%26Format%3D_SL160_%26ID%3DAsinImage%26MarketPlace%3DUS%26ServiceVersion%3D20070822%26WS%3D1%26tag%3Dcewebproperti-20%26language%3Den_US%22%20%3E%3C%2Fa%3E%3Cimg%20src%3D%22https%3A%2F%2Fir-na.amazon-adsystem.com%2Fe%2Fir%3Ft%3Dcewebproperti-20%26language%3Den_US%26l%3Dli2%26o%3D1%26a%3DB0771NDGHF%22%20width%3D%221%22%20height%3D%221%22%20border%3D%220%22%20alt%3D%22%22%20style%3D%22border%3Anone%20!important%3B%20margin%3A0px%20!important%3B%22%20%2F%3E” link-imgs=”false” specs=”Unique folding frame and quick release wheels pack up neatly for compact storage and transport, perfect for your next family trip~~~Universal coupler easily attaches to almost any bicycle for added versatility one time installation~~~Two in One canopy has bug screen and weather shield for protection from the elements 16 inch air filled tires with molded rims provide a smooth ride~~~Holds one child up to 40 pounds and has an additional 12 pounds of convenient storage for whatever else you need for your ride~~~” btn-color=”#ff9900″ btn-text=”” alignment=”aligncenter” hide-prime=”0″ hide-image=”0″ hide-reviews=”0″ hide-price=”0″ hide-button=”0″ width=”750″]Schwinn Trailblazer Single Bike[/amalinkspro]
Insert the pin through the holes and insert the clip through the pin (or screw on washer and nut for older models. The clip (or nut) will keep the pin from popping out during the bike ride. Never ride without securing the pin.
3. Attach the Safety Strap
The safety strap is connected to the arm of the trailer and should be wrapped around the frame of the bike and clipped back to the arm.
In case the trailer comes loose, the safety strap will keep the trailer connected to the bike until you are able to slow down. Without a safety strap, your cargo can veer into the street, causing great danger to passengers of the trailer and drivers on the road.
4. Test Drive
This step is key! You never want to go out without making sure everything is connected properly. Keep yourself safe!! There is nothing like a good bicycle ride!