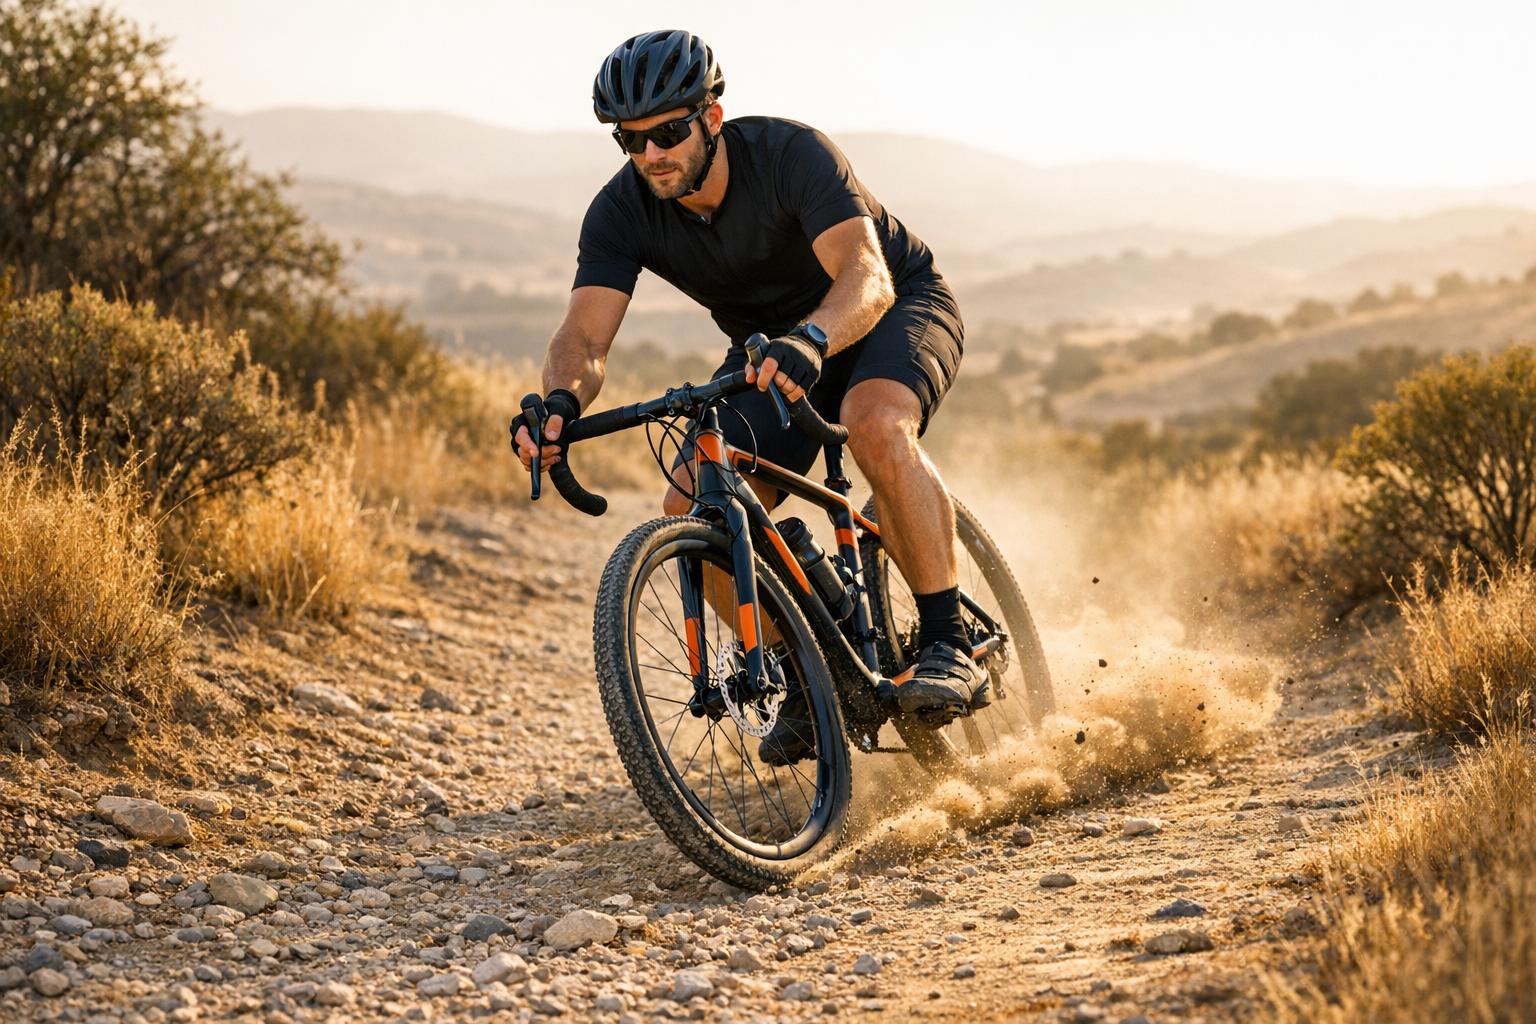
Loose terrain can be one of the most challenging surfaces for mountain bikers, but with the right techniques and setup, you can ride confidently and stay in control. Here’s what you need to know:
- Bike Setup: Adjust tire pressure, choose tires with aggressive knobs, and tune your suspension for better grip. Use a dropper post to shift your weight effectively on climbs and descents.
- Body Position: Hover above the saddle with bent arms and knees. Keep your weight centered and let the bike move beneath you.
- Braking: Apply brakes gradually to avoid skidding. Brake in straight lines before corners and feather the rear brake when needed.
- Vision: Look 15–20 feet ahead to plan your line and maintain control.
- Specific Techniques: For cornering, lean into the turn and shift weight to the outside pedal. Descend steep sections by lowering your center of gravity and modulating your brakes. On climbs, use a steady cadence and balance weight for traction.
Practice drills like track stands, slow figure eights, and braking exercises to build confidence and refine your skills. Start on easier terrain and progress gradually. With consistent practice, loose terrain will become manageable and less intimidating.
How To Ride LOOSE Terrain | Mountain Biking Tips
How Traction Works on Loose Surfaces
Types of Loose Terrain and Tire Characteristics for Mountain Biking
To tackle the challenges of riding on loose terrain, it’s essential to understand how tires interact with these tricky surfaces.
Types of Loose Surfaces and Their Characteristics
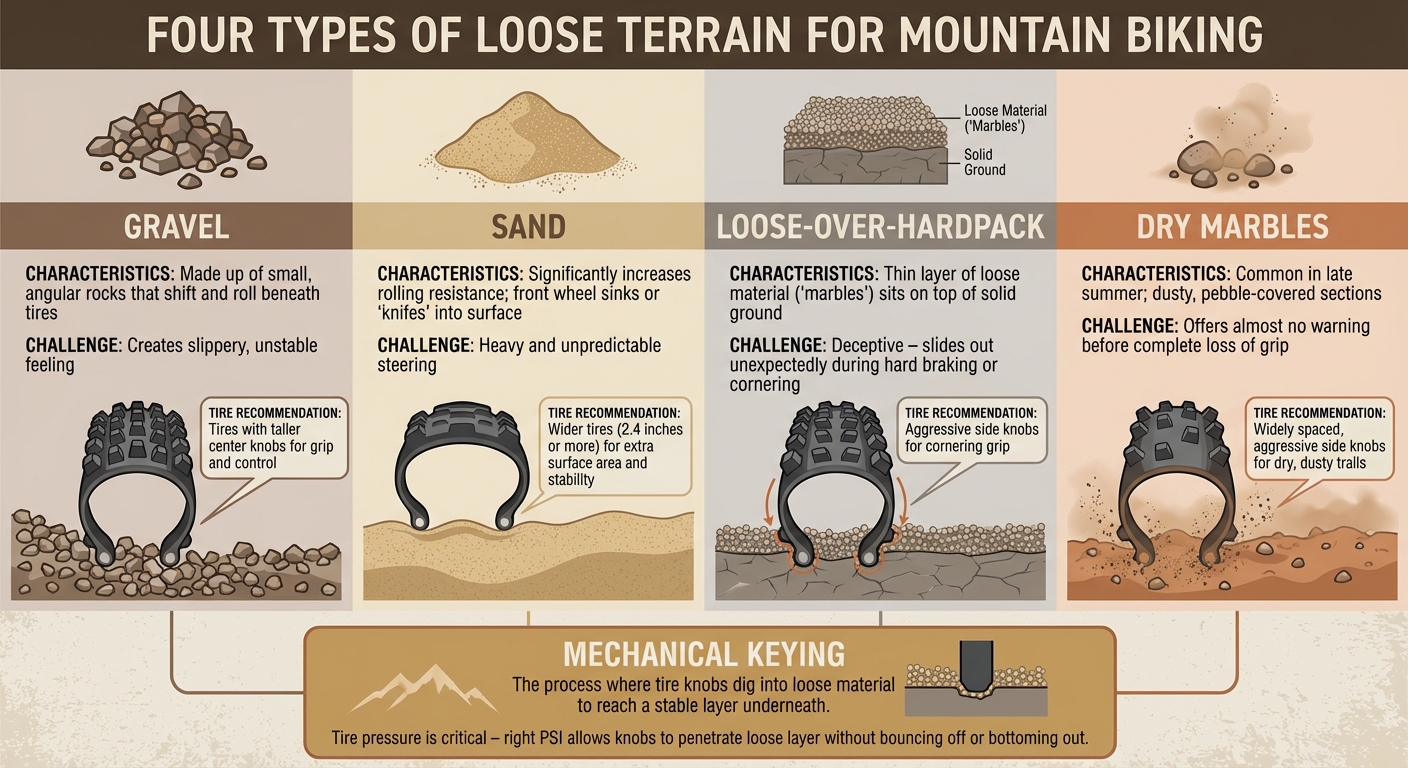
Loose terrains behave differently depending on their makeup:
- Gravel: Made up of small, angular rocks, gravel tends to shift and roll beneath your tires, creating a slippery, unstable feeling.
- Sand: Sand increases rolling resistance significantly. It often causes the front wheel to sink or "knife" into the surface, making steering heavy and unpredictable.
- Loose-over-hardpack: This surface creates a deceptive challenge. A thin layer of loose material, often referred to as "marbles", sits on top of solid ground. It can slide out unexpectedly during hard braking or cornering.
- Dry marbles: Common in late summer, these dusty, pebble-covered sections are particularly tricky. They offer almost no warning before your tires lose grip entirely.
Each of these surfaces requires a tire setup capable of adapting to constant shifts in grip and stability.
How Tires Grip Loose Ground
Traction on loose surfaces doesn’t work the same way as it does on firmer trails. Tires depend on a process called "mechanical keying" – the knobs on the tire must dig into the loose material to reach a stable layer underneath. However, when force is applied – whether through braking, pedaling, or cornering – the loose particles shift and slide against each other, reducing the friction between your tires and the ground.
Tire pressure plays a critical role here. The right PSI allows the tire knobs to penetrate the loose layer without bouncing off the surface or bottoming out. Too much pressure leads to sliding, while too little can increase the risk of pinch flats and reduce overall support. Adjusting your tire pressure based on your weight, bike type, and the specific terrain is vital to maintaining grip.
Core Principles for Staying Stable
Staying stable on loose terrain boils down to three key principles: lowering your center of gravity, making smooth movements, and using active body positioning.
When you hover slightly above the saddle with bent arms and knees, you lower your center of gravity and turn your body into a dynamic suspension system. This position helps you absorb the constant shifts in the terrain without letting them affect your steering or balance.
Smooth, controlled movements are equally important. Sudden braking, sharp steering, or abrupt weight shifts can cause the loose surface to give way beneath you. Staying relaxed allows your body to naturally follow the bike’s movements, keeping you in control. Your legs, acting like shock absorbers, extend and compress to maintain tire contact with the ground, even as the terrain varies in texture and elevation.
Setting Up Your Bike for Loose Terrain
When riding on loose terrain, getting your bike dialed in is all about maintaining traction and control. By fine-tuning your setup, you can handle shifting surfaces with greater confidence.
Tire Selection and Pressure Adjustments
The right tires make all the difference when tackling loose ground. For dry, dusty trails, go with tires that have widely spaced, aggressive side knobs. In deep sand, wider tires (around 2.4 inches or more) provide the extra surface area needed for stability. On loose rocks and gravel, tires with taller center knobs improve grip and control.
Tire pressure is equally important. Use a pressure calculator that factors in your weight, rim width, and the type of terrain you’re riding. Heavier riders typically need higher pressures, while lighter riders can run slightly lower pressures for better traction. If you’re using inner tubes, a small increase in pressure can help prevent pinch flats. The goal is to let the tire knobs dig into the loose surface without the casing collapsing during hard cornering.
Once your tires are ready, move on to adjusting your suspension to further enhance grip and stability.
Suspension Tuning for Better Stability
Loose terrain requires a more compliant suspension setup compared to firmer trails. Start by setting your sag to about 28–30% on both the fork and the shock. To check this, stand on your bike and compress the suspension; the O-ring should settle within that range of total travel.
After dialing in your sag, tweak your compression damping. Open it up slightly to allow the suspension to respond quickly to small bumps and loose rocks, which helps the bike stay planted instead of skimming over uneven surfaces. If your fork or shock has separate high-speed and low-speed compression adjustments, begin by softening the low-speed settings. Then, adjust the rebound to keep everything feeling balanced and predictable.
With your suspension sorted, turn your attention to the cockpit for even better control.
Handlebar, Brake, and Dropper Post Setup
Your cockpit setup plays a big role in managing loose terrain. Wider handlebars (about 780–800mm) give you more leverage and make it easier to stay in control. Position your brake levers so your wrists stay neutral, allowing for quick, precise braking when needed.
Don’t forget about your dropper post – it’s a game changer on loose trails. Lowering the saddle completely during descents shifts your weight back, helping the front tire maintain grip. On climbs, raising the saddle allows for better power transfer while still giving you the ability to shift your weight forward to maintain traction. Quick saddle adjustments as the terrain changes can make a huge difference in staying stable and in control.
Core Riding Techniques for Loose Terrain
Once your bike is dialed in, the real challenge lies in your riding technique. Mastering loose terrain comes down to three essentials: body position, braking, and vision.
Body Position for Maximum Control
To stay in control, stand on the pedals with your knees and elbows bent, hovering just above the saddle. Picture this: "squat legs, pushup arms." This stance helps absorb bumps and keeps your tires connected to the ground. Center your weight to evenly distribute pressure between the front and rear wheels.
Let the bike move freely beneath you. If the front wheel glances off a rock or the rear tire slides a bit in sand, keep your upper body steady while the bike shifts and leans. Focus on keeping your feet heavy on the pedals and your grip light on the handlebars. This approach ensures you stay balanced and avoid oversteering when the front tire bounces through loose patches.
Braking on Loose Ground
Slamming on the brakes in loose terrain is a recipe for skidding and losing control. Instead, practice progressive braking – apply both brake levers gradually, increasing pressure smoothly rather than grabbing them abruptly. This technique helps your tires maintain grip on unstable surfaces instead of slipping across them.
Whenever possible, brake in straight lines before entering corners or steep sections. Once you’re navigating a turn or descending through loose terrain, ease off the brakes and let your momentum guide you. If you need to slow down mid-section, gently feather the rear brake. A slight rear drift is manageable, but locking up the front wheel can lead to a crash. Controlled braking not only keeps you stable but also allows you to focus on what’s ahead.
Looking Ahead and Staying Relaxed
Good vision ties everything together. Look 15–20 feet ahead – or farther if you’re riding at higher speeds – to identify the best line through loose debris before you hit it. This forward focus helps you avoid sudden, destabilizing corrections. Instead of fixating on obstacles like rocks or deep sand, concentrate on the path you want to follow.
Relaxation is just as important as where you look. Stay loose to maintain smooth, confident control over your bike. Keep your chin up, shift your gaze between the immediate trail and the distance ahead, and guide your bike with calm, deliberate movements. This composure will carry you through even the trickiest terrain.
sbb-itb-9d75ae1
Techniques for Specific Loose Terrain Situations
Now that you’ve got the basics down, let’s dive into three common scenarios where loose terrain calls for specific techniques: cornering, descending steep sections, and climbing. These methods build on your bike setup and riding fundamentals, fine-tuning them for the challenges of loose ground.
Cornering on Loose Surfaces
Cornering on loose terrain is a whole different ballgame compared to hard-packed turns. The trick is to find compact lines – look for areas with compressed dirt or natural berms that offer more grip than loose debris.
Before entering the turn, finish your braking. Smoothly apply the brakes ahead of the corner, then release as you lean into it. Keep your outside pedal firmly down and shift your weight onto it while pointing your inside knee toward the apex. This lowers your center of gravity and helps your tires dig into the surface. Keep your eyes locked on the exit of the turn; your bike will naturally follow where you’re looking.
Once you’ve nailed cornering, it’s time to tackle the challenges of steep descents.
Descending Steep Loose Sections
Loose, steep descents can feel intimidating, but they’re all about trusting your bike and staying composed. Start by dropping your heels, driving weight into the bottom bracket to stabilize yourself. This lowers your center of gravity and reduces the risk of pitching forward when the front wheel hits uneven terrain. Use your dropper post to lower the saddle, giving you room to shift your hips back while keeping enough weight over the front tire for control.
Brake modulation is critical – apply both brakes gradually to manage your speed without locking the wheels. A locked wheel loses all traction, turning your bike into a sled. Expect the bike to shift and slide a bit; guide it by keeping your upper body relaxed and your grip light. Look 15–20 feet ahead to spot smoother lines and anticipate changes in the terrain.
Climbing Through Loose and Rocky Terrain
Climbing on loose, rocky trails is all about maintaining control and delivering consistent power. Shift into an easier gear to keep a steady cadence and reduce the risk of rear tire spin. Lean slightly forward to prevent the front wheel from lifting, but keep your weight balanced over the rear wheel to maintain traction.
Adjust your drivetrain and tire pressure to suit the climb. Lowering tire pressure increases the contact patch, allowing the tires to grip rocks and loose dirt more effectively. Keep your pedal strokes smooth and circular – jerky movements can break traction. If the rear wheel starts to slip, resist the urge to stand or mash the pedals harder. Instead, maintain your cadence, focus on your line, and let your momentum and smooth technique do the work. Staying steady beats powering through in bursts every time.
Practice Drills for Building Skills
As we’ve covered, getting your body positioning and braking technique right is key. These drills are designed to help you practice and refine those skills in a controlled environment. They’ll build your confidence on loose terrain by focusing on balance, movement, and braking control. To get the most out of them, practice on safe, predictable surfaces where you can concentrate on technique without worrying about unexpected challenges.
Balance and Low-Speed Control Exercises
Start with track stands, which are all about staying stationary on your bike. Begin on flat, solid ground and aim to hold your position for 5–10 seconds without putting a foot down. Once you’re comfortable, move to a mild uphill slope and eventually try it on loose gravel. This drill teaches you how to make small adjustments with your hips and handlebars to stay balanced, even when the ground shifts beneath you.
Next, try slow figure eights and small circles around markers. These help improve your steering precision and teach you to distribute your weight effectively. Start on hard-packed ground, then gradually shrink the size of your circles and transition to looser terrain. The goal is to ride at walking speed, keep your pedals level, and let your knees stay wide so the bike can lean and move naturally. You can also incorporate ratcheting drills, where you practice short, partial pedal strokes over loose rocks. This helps you deliver power smoothly without losing traction.
Once you’re steady at low speeds, it’s time to focus on braking and movement.
Movement and Braking Practice
Find a gentle slope with plenty of space to roll out safely. Mark your start and finish points, then practice braking in a controlled way. Start by using only the front brake, then the rear brake, and finally both together. The goal is to apply smooth, progressive pressure to avoid skidding and to feel how each brake behaves on loose terrain. This will help you find the sweet spot where your tires grip the ground without sliding. According to IMBA skills clinics, focused braking drills can reduce common mistakes like skids and front-wheel lockups by 30–40% for newer riders.
Work on the "heavy feet, light hands" technique on loose sections of trail. Keep most of your weight through your pedals while maintaining a relaxed grip on the handlebars. This helps prevent the front wheel from deflecting off course and keeps you calm when the bike moves unexpectedly.
How to Progress Safely
Start on familiar terrain that’s free of obstacles – grassy fields or flat dirt paths are perfect. Add challenges one step at a time. For example, master track stands on firm ground before trying them on gravel, or practice braking drills on hard-packed dirt before tackling deep dust. Keep your sessions short, around 10–20 minutes, to avoid fatigue, which can lead to poor posture and mistakes. Always choose areas with a clear run-out for practicing slides or emergency stops.
As you gain confidence, gradually increase the difficulty of your drills. You can also look into local skills clinics or resources like Intermountain Bikes for structured guidance that complements these exercises.
Conclusion
Mastering loose terrain riding boils down to a solid bike setup, refined technique, and regular practice. Start with the basics: adjust your tire pressure, suspension, and cockpit position to create a stable foundation. Then, focus on your body position – think pushup arms, squat legs, and heavy feet – to stay balanced while the bike moves beneath you. Smooth, gradual braking and keeping your eyes forward will help you stay in control, even when the ground feels unpredictable.
Before tackling any loose section, take a moment to mentally check your setup: tire pressure, dropper post position, body stance, grip on the bars, and your sightline. This quick routine works no matter where you’re riding or what type of trail you’re facing.
The techniques for cornering, descending, and climbing all tie back to these core principles. As covered earlier, these fundamentals are the building blocks for navigating challenging terrain with confidence.
Skill-building takes time, so be patient with yourself. Start with balance and braking drills on trails you know well, and gradually push into more challenging terrain as you improve. Keep your practice sessions manageable to avoid fatigue, and don’t rush into sections that feel beyond your current ability. If you need extra guidance, Intermountain Bikes can provide tips to fine-tune your technique.
With consistent practice, these techniques will become second nature. Loose terrain will no longer feel intimidating – it’ll just be another part of the ride. Get out there, apply what you’ve learned, and let experience build your confidence.
FAQs
What’s the best way to set tire pressure for riding on loose terrain?
For riding on loose terrain, aim to keep your tire pressure between 20 and 25 PSI. Lowering the pressure helps the tires grip the surface better and improves control by letting them adapt to uneven ground. However, be cautious not to go too low, as it could damage the rim or cause a pinch flat.
The exact pressure that works best can vary based on your weight, the width of your tires, and the specific trail conditions. Try experimenting within this range to fine-tune the balance for stability and a smoother ride. Adjust as needed to match the terrain and your riding style.
What is the best body position for staying in control on loose terrain?
To navigate loose or shifting terrain effectively, position your body so it stays centered over the bike, with a slight lean toward the rear. Keep your knees and elbows bent to absorb bumps and maintain flexibility – this helps you react quickly to uneven surfaces. Stay calm, and allow the bike to move naturally beneath you for improved balance and control.
What’s the best way to brake safely on loose terrain?
When braking on loose terrain, the key is to apply smooth and gradual pressure to both brakes. This approach helps you avoid locking up your wheels, which can lead to a loss of traction. At the same time, shift your weight slightly backward to maintain balance and reduce the risk of the front wheel skidding.
Stay alert to the surface beneath you and adjust your braking force based on how loose or uneven it feels. Spending time practicing on different types of loose terrain, like gravel or sand, can help you gain confidence and sharpen your control over time.


