Night mountain biking is thrilling but brings safety risks, especially in low-light conditions where 51% of cycling fatalities occur. A reliable light setup is essential to illuminate trails and increase visibility to others. Most experts recommend at least 700 lumens for safe riding at 20 mph, but trail type and speed may require more.
Key factors to consider when choosing lights:
- Brightness (Lumens): 900–1,000 lumens work for most trails; technical rides may need up to 2,000 lumens.
- Battery Life: Choose rechargeable systems or swappable batteries for longer rides.
- Durability: Weatherproofing (IPX ratings) and sturdy mounts are critical for rough trails.
- Mounting Options: Handlebar and helmet mounts provide flexibility for different conditions.
Top Picks:
- Exposure MaXx-D MK15: 4,600 lumens, IP65 waterproof, $798.99.
- Magicshine Monteer 12000: 12,000 lumens, customizable settings, $424.99–$549.99.
- Moon Rigel Max 1500: 1,500 lumens, compact design, mid-range price.
- Sigma Buster 700: 700 lumens, affordable, ideal for beginners.
Quick Comparison:
| Light | Max Lumens | Runtime (High) | Waterproof | Price | Best For |
|---|---|---|---|---|---|
| Exposure MaXx-D MK15 | 4,600 | 2–36 hours | IP65 | ~$798.99 | Technical trails |
| Magicshine Monteer | 12,000 | 2.5–121 hours | IPX6 | $424.99–$549.99 | Open trails, brightness |
| Moon Rigel Max 1500 | 1,500 | Not specified | Not specified | Mid-range | Mixed terrain |
| Sigma Buster 700 | 700 | Not specified | Not specified | Budget-friendly | New riders, backup |
The right light ensures safety and transforms night rides into exciting adventures. Choose based on your trail type, riding style, and budget.
Best Mountain Bike Lights 2023 | Rated & Reviewed
What to Look for in Mountain Bike Lights
Finding the right mountain bike lights means aligning their features with your riding style and conditions. Think about the trails you tackle, the terrain you navigate, and how long you typically ride. Here’s a closer look at the key features to consider.
Light Output (Lumens)
Lumens measure how bright a light is, but brighter doesn’t always mean better. For most trail rides, a light output of 900 to 1,000 lumens usually works well. That said, the beam pattern is just as important as the brightness. A wide, evenly diffused beam can make a lower-lumen light outperform a higher-lumen one with poor design. As one rider shared:
"My lumen sweet spot for the ‘downcountry’ trail riding I do at night is around 800 lumens as long as the beam pattern is wide enough and diffused well, across my whole field of view within the beam pattern." – ELmRidge, MTBR Forum User
For smoother trails, lower outputs may be sufficient, but technical singletrack often calls for higher outputs – sometimes up to 2,000 lumens when combining handlebar and helmet lights. Many lights offer adjustable brightness settings, so you can conserve battery on easier sections and crank up the power when the trail gets tricky.
Battery Life and Power Options
Battery life is a crucial factor, especially for longer rides. Most lights offer adjustable power modes, which affect runtime. Using external power banks or swappable batteries can significantly extend how long your light lasts.
| Light Setup | Weight | Runtime |
|---|---|---|
| Rechargeable Battery Light (Outbound Detour, 1,200 lumens) | 186g | 1.7 hours |
| Rechargeable with 10,000mAh Power Bank | 386g | 5.1 hours |
| Dynamo-Powered System (Klite Ultra Adventure, 1,300 lumens) | 476g | Infinite |
Swappable batteries are especially handy – they let you restore full power instantly by replacing the old battery with a fresh one. Rechargeable 18650 lithium-ion batteries, which cost about $10–$20 each, are a practical choice for extended rides. It’s also smart to carry a backup light, like the Niterider Lumina 1200 Boost or Ravemen LR1600, in case your main light fails.
Build Quality and Weather Protection
Mountain bike lights endure a lot – vibrations, impacts, mud, rain, and temperature swings. Look for models built to handle these challenges. Weatherproofing is key, and an IPX rating tells you how water-resistant a light is. For instance, IPX4 handles light rain, while IPX6 or IPX7 offers stronger protection.
A secure mounting system is also essential. Tool-free mounts that stay firmly in place, even on rough terrain, are a must. Additionally, lights with aluminum housings and heat sinks help prevent overheating, ensuring consistent performance. Check that the buttons are easy to operate, even with gloves on – this can make a big difference on cold rides.
Though high-quality lights might cost more initially, their durability and reliability are worth the investment. A light failure mid-ride isn’t just a hassle; it can be downright dangerous.
Best Mountain Bike Lights for Night Riding
When it comes to night mountain biking, having the right light can make all the difference. Below are some top options that excel in performance, durability, and features. Whether you’re an experienced rider or just starting out, there’s something here to suit your needs and budget. A comparison table at the end provides a quick overview of key specifications.
Exposure MaXx-D MK15
The Exposure MaXx-D MK15 is a standout choice for seasoned riders who demand top-tier performance. With a powerful 4,600 lumens of measured output, it lights up even the most technical trails. Its Reflex++ technology automatically adjusts brightness based on your speed and surroundings, ensuring optimal visibility without manual adjustments. Built to withstand tough conditions, it boasts an IP65 waterproof rating, making it reliable in heavy rain or muddy environments. Depending on the power mode, the runtime ranges from 2 to 36 hours.
"The Maxx D is backed up with 4600 measured lumens to be at one with any terrain." – Oz Backcountry
Priced around $798.99, this light is a serious investment for those who prioritize high performance and reliability.
Magicshine Monteer 12000
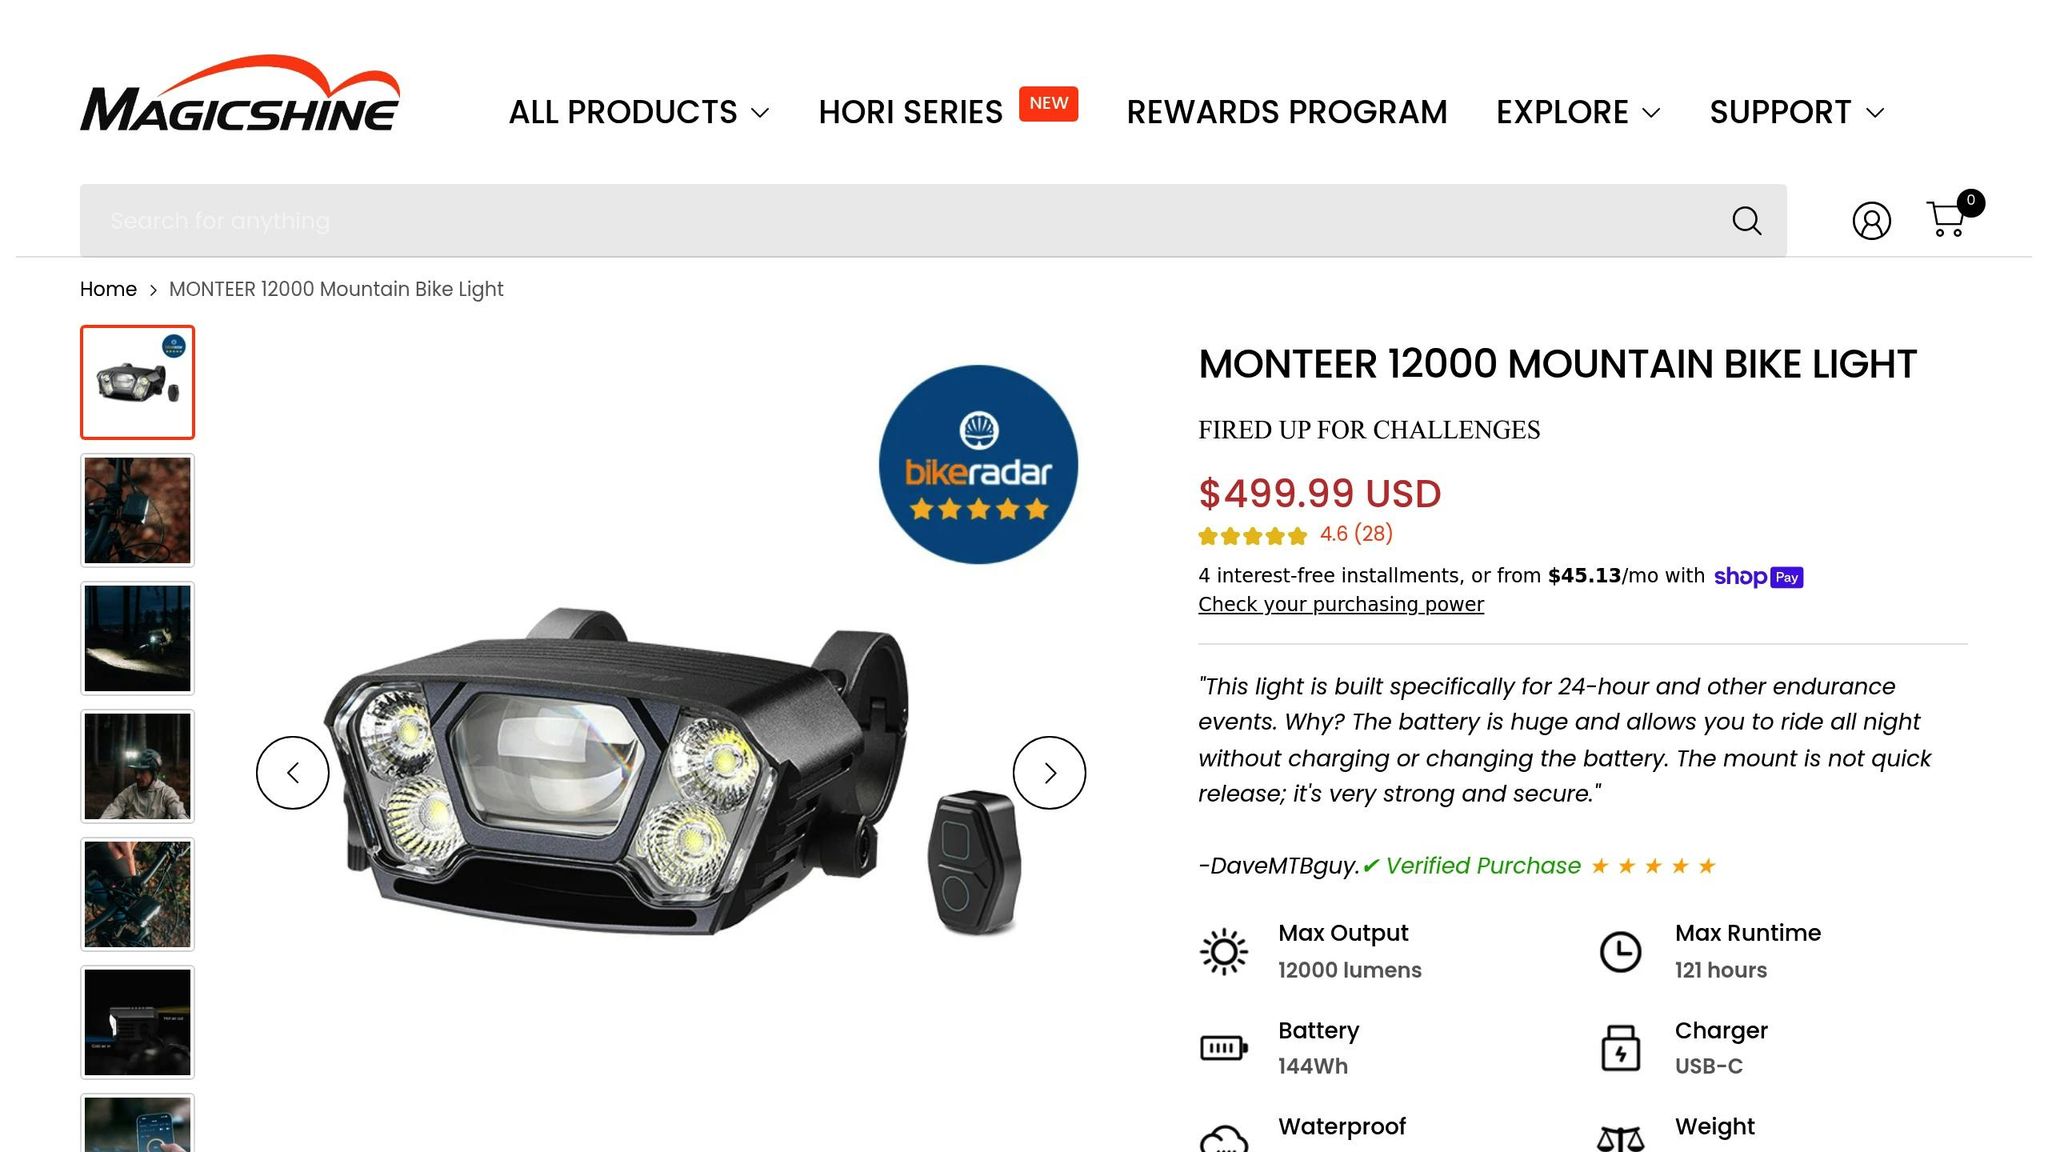
If brightness is your top priority, the Magicshine Monteer 12000 delivers an astonishing 12,000 lumens with a beam throw of up to 360 meters. It features a removable external battery pack with charge indicators and customizable settings, allowing you to tailor the light to your specific riding conditions. The runtime varies from about 2.5 hours at maximum power to an impressive 121 hours on lower settings.
"The new MONTEER 12000 is our most powerful bicycle light to date, designed specifically for MTB, trail crossing, road racing, and urban commuting." – Magicshine
While users rave about its brightness and durability, the battery pack’s bulkiness and mounting challenges on some handlebars are worth considering. Priced between $424.99 and $549.99, this light is ideal for riders tackling open trails and high-speed descents.
Moon Rigel Max 1500
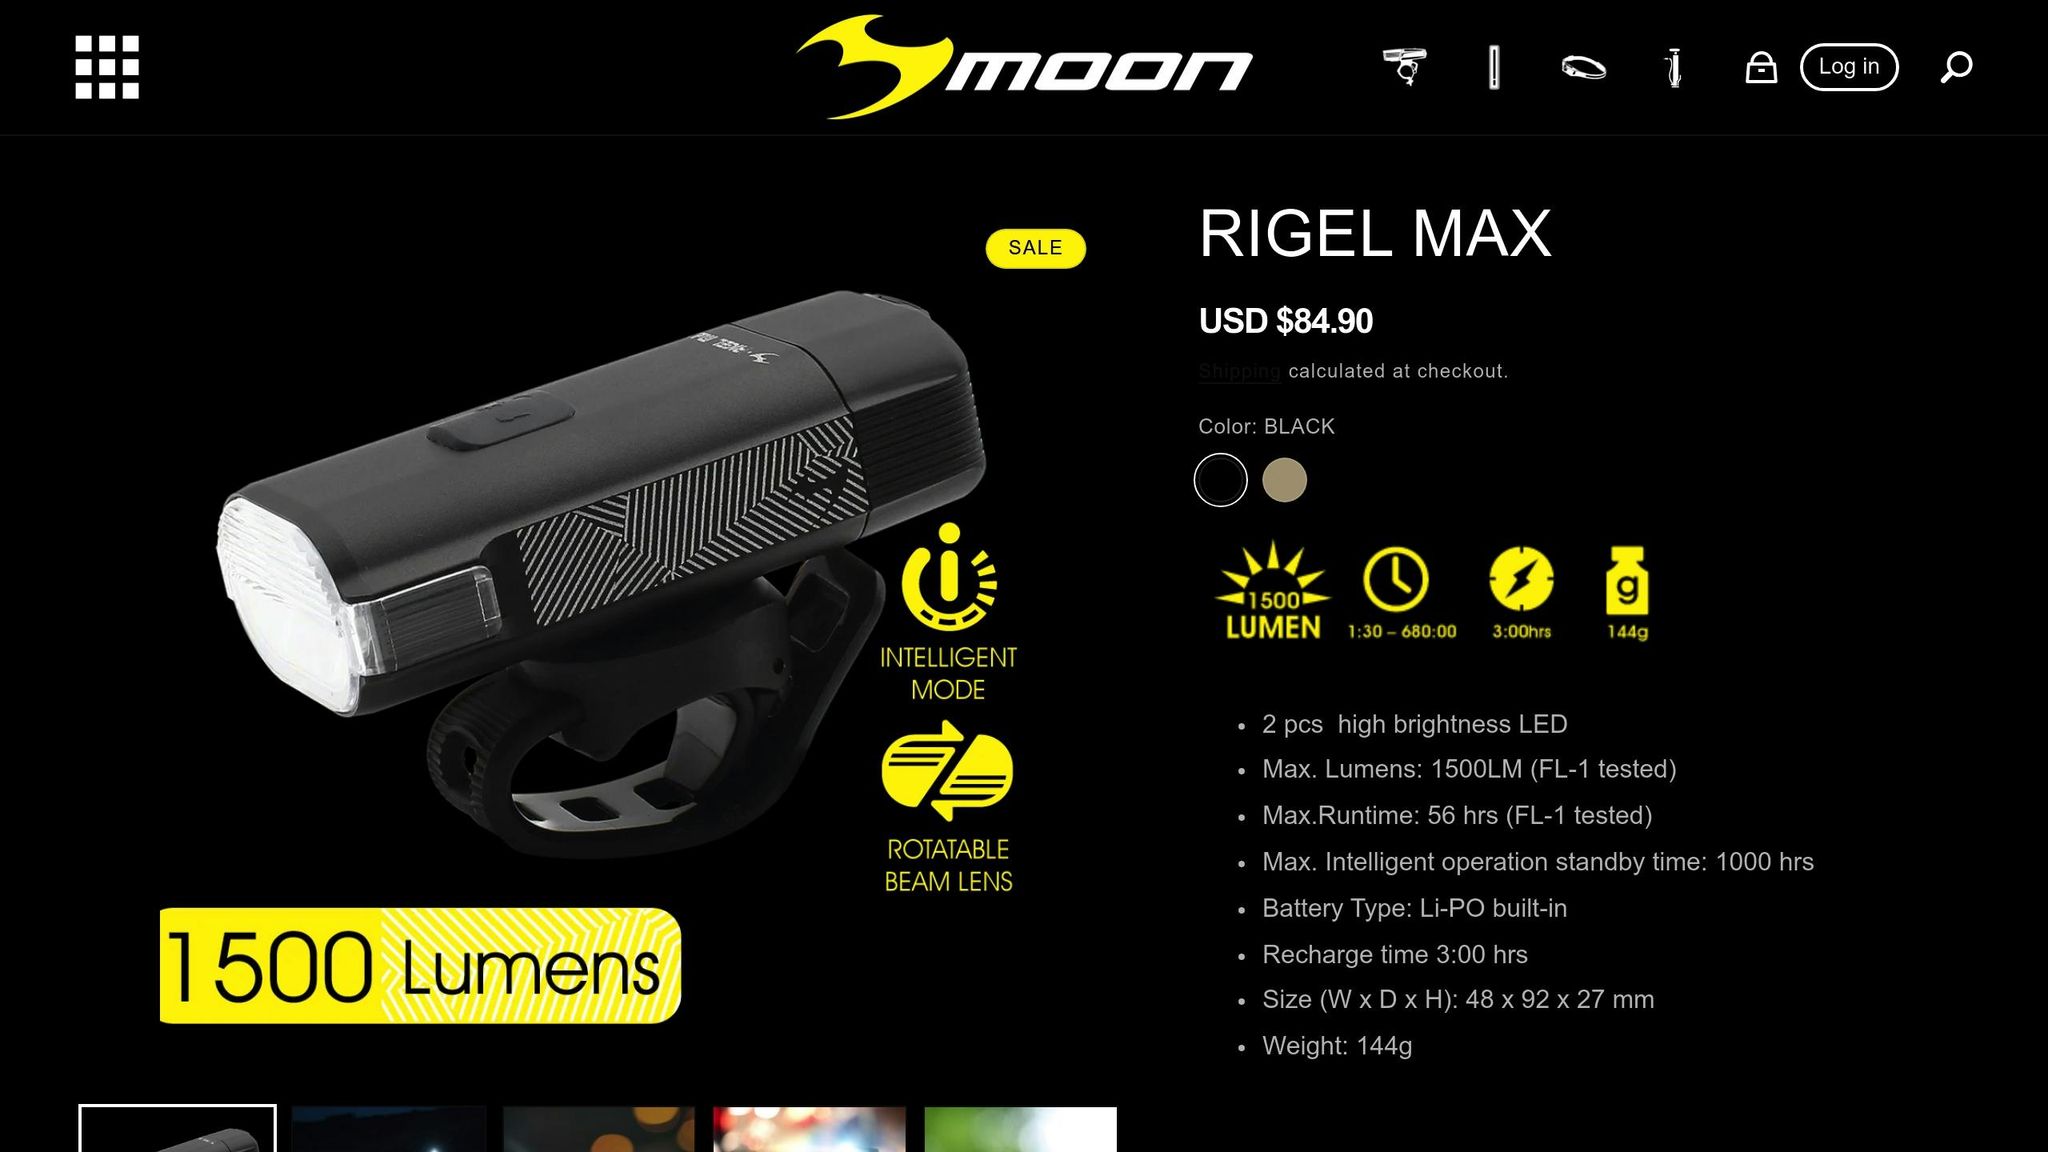
The Moon Rigel Max 1500 strikes a balance between power and portability. Offering 1,500 lumens and an anti-glare lens design, it provides even light distribution, reducing eye strain on longer rides. Its compact and lightweight build allows for easy mounting on handlebars or helmets, ensuring it doesn’t interfere with handling. While details on runtime and waterproofing are scarce, this mid-range light is a versatile option for mixed terrain and general use.
Sigma Buster 700 (Budget Pick)
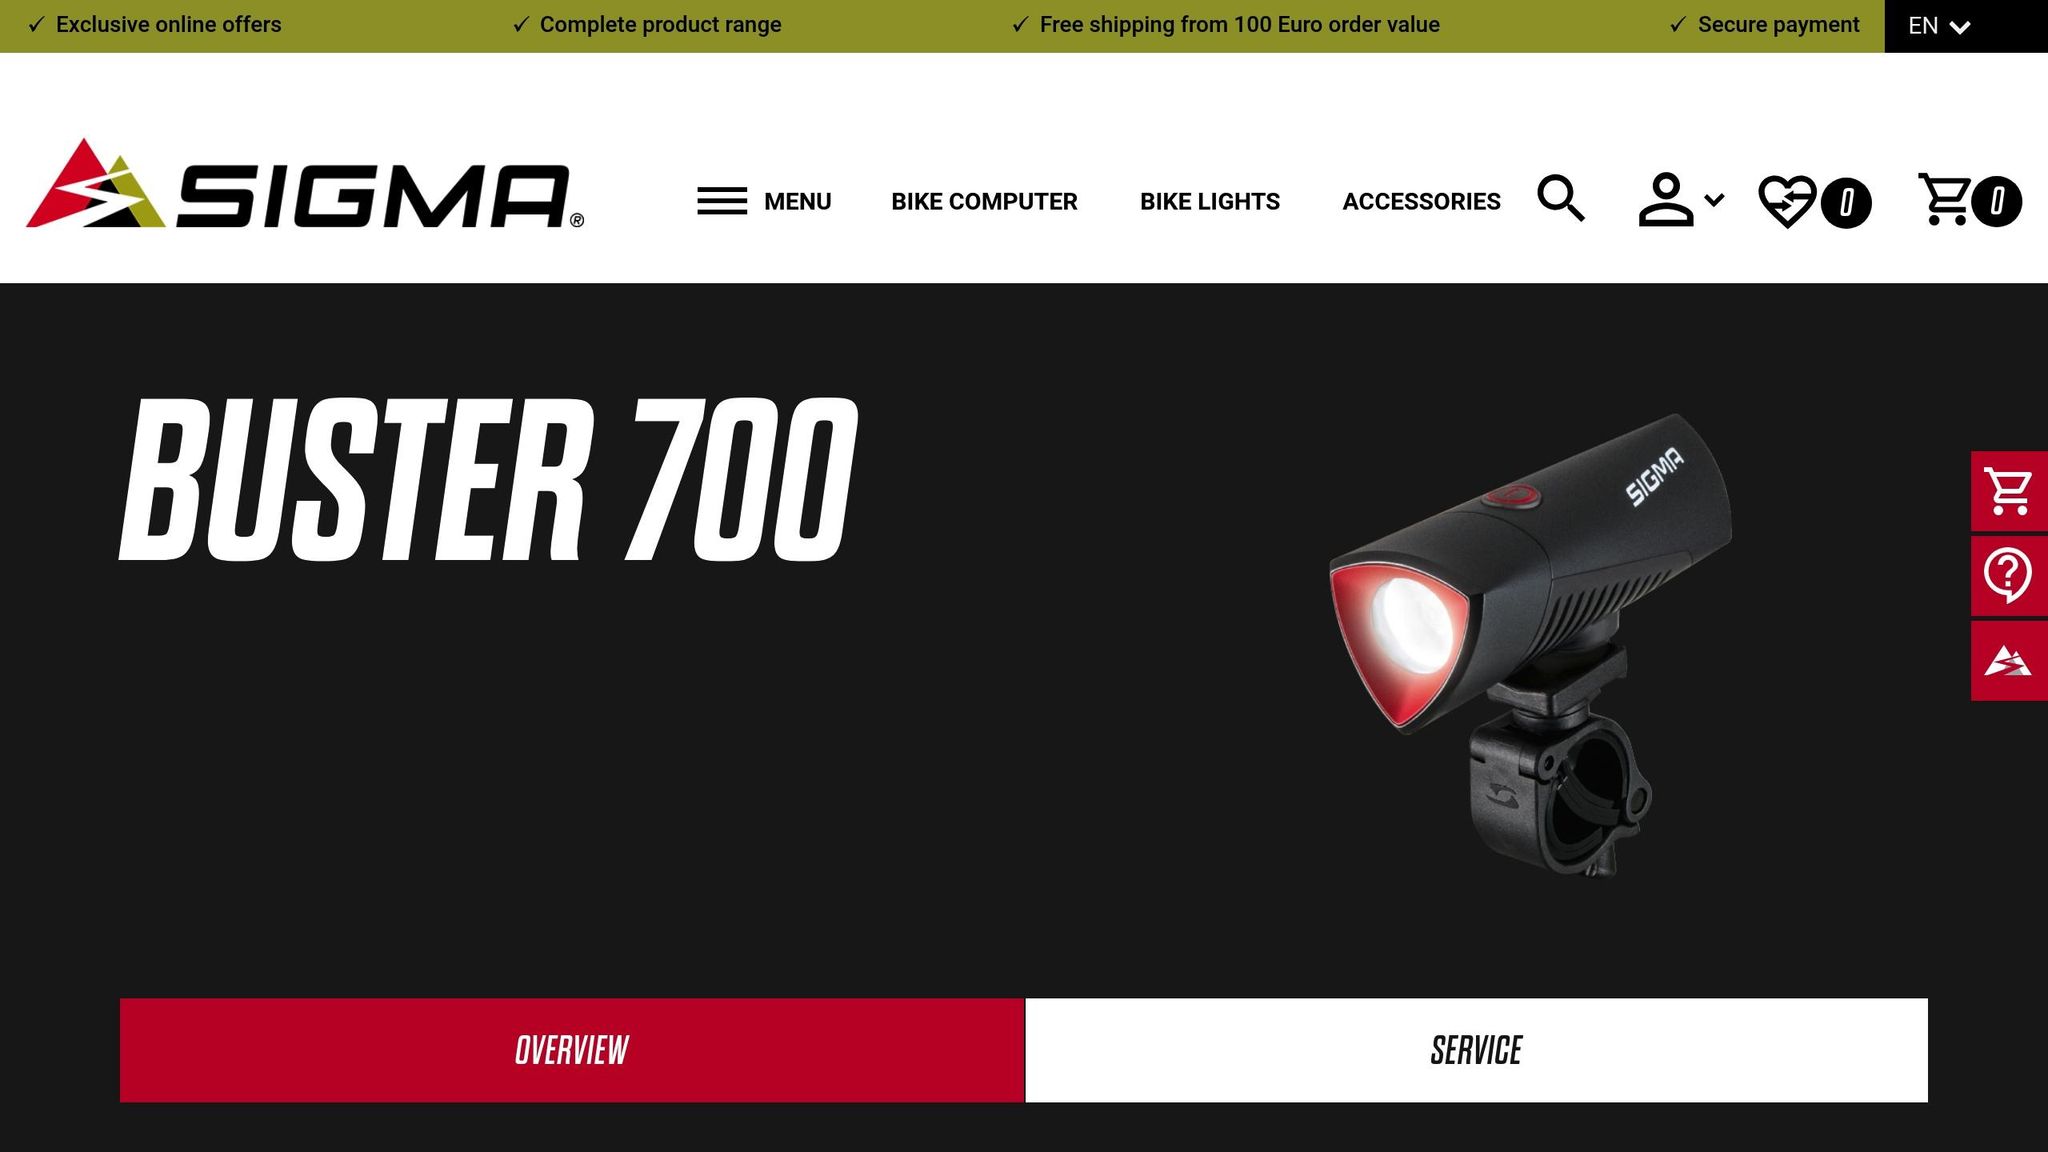
For those on a budget or in need of a reliable backup, the Sigma Buster 700 is a solid choice. With 700 lumens, it covers the essentials for safe night riding. Its lightweight design makes it perfect for newcomers to night biking or as a secondary light for extra visibility. While it lacks advanced features, it provides dependable performance at an affordable price.
| Feature | Exposure MaXx-D MK15 | Magicshine Monteer 12000 | Moon Rigel Max 1500 | Sigma Buster 700 |
|---|---|---|---|---|
| Max Lumens | 4,600 | 12,000 | 1,500 | 700 |
| Runtime Range | 2–36 hours | 2.5–121 hours | Not specified | Not specified |
| Waterproof Rating | IP65 | IPX6 | Not specified | Not specified |
| Price Range | ~$798.99 | $424.99–$549.99 | Mid-range | Budget-friendly |
| Best For | Technical trails, experienced riders | Open trails, maximum brightness | Mixed terrain, versatility | New riders, backup light |
| Key Feature | Reflex++ auto-brightness | App customization, wireless remote | Anti-glare lens design | Affordable entry point |
With options ranging from high-end lights for technical trails to budget-friendly picks for beginners, there’s a light here to illuminate your next adventure. Use the comparison chart to find the one that best suits your riding style and needs.
sbb-itb-9d75ae1
Light Comparison Chart
The table below outlines key specifications for some of the top-rated bike lights, helping you make an informed decision.
| Light | Max Lumens | Battery Life (High) | Mounting Options | Weight | Price |
|---|---|---|---|---|---|
| Outbound Lighting Trail Evo | ≈2,200 | 1.7 hours | Handlebar | Not specified | $245 |
| Exposure Six Pack Mk13 | 5,450 (max) | 2 hours | Handlebar | 404g + 27g mount | $536 |
| Fenix BC30 V2.0 | 2,200 (burst) | 2.3 hours | Handlebar + Remote | 154g | $120 |
| Knog Blinder X 1800 | 1,800 | 2.5 hours | Handlebar, Helmet | 153g + 280g battery | $220 |
| Exposure Zenith Mk3 | 2,200 | 1 hour | Handlebar, Helmet | 147g + 11g mount | $320 |
Understanding the Numbers
When it comes to brightness, lumens are the go-to measure. However, brighter doesn’t always mean better. Most trail lights strike a balance between 1,500 and 3,000 lumens, offering solid visibility without draining the battery too quickly. Lower brightness settings can significantly extend runtime, which is worth considering for longer rides.
Beyond brightness, think about mounting options and weight. These factors can directly affect your comfort and the overall performance of your setup.
Mounting Flexibility Matters
A light that offers multiple mounting options can adapt to different trail conditions or riding styles. For instance, the Exposure Zenith Mk3 includes both handlebar and helmet mounts, giving you the freedom to switch configurations as needed. Similarly, the Fenix BC30 V2.0 stands out with its wireless handlebar remote, allowing you to adjust the settings without taking your hands off the bars – a feature that can be especially handy on technical trails.
Weight Considerations
The weight of your light setup can influence your ride, especially on longer trails. Lights with external battery packs, like the Knog Blinder X 1800, add extra weight to your gear – its external battery alone weighs 280g. On the other hand, integrated designs, such as the Outbound Lighting Trail Evo, provide a sleeker and lighter option, which might be more appealing for riders prioritizing a minimalist setup.
Price vs. Performance
This comparison highlights options across various price points. If you’re on a budget, the Fenix BC30 V2.0 offers an impressive 2,200 lumens for just $120, though it does require separate 18650 batteries. For those seeking premium features, models like the Exposure Six Pack Mk13 deliver unmatched brightness and durability but come at a higher cost. Ultimately, your decision will hinge on which features matter most to you – whether it’s brightness, mounting flexibility, or runtime – and how much you’re willing to invest.
It’s worth noting that manufacturer battery life claims are based on ideal conditions, but real-world performance is often about 35% lower. Most high-performance lights deliver between 1.5 and 2.5 hours at maximum output, which aligns well with the figures in this chart.
Night Riding Tips and Safety
Night mountain biking changes the game entirely, turning familiar trails into a whole new challenge. It’s not just about picking the right light – preparation and safety are key to making your ride both fun and secure. Let’s dive into some practical tips to help you handle the unique demands of riding after dark.
Trail Safety and Etiquette
When you’re out on the trails at night, sticking to safety basics can make all the difference. Let someone know your route and expected return time. This small step could be a lifesaver if you run into mechanical issues or get hurt on a remote trail.
"The dark adds an extra element of risk to any endeavor. Be prepared with the essentials whenever you leave home to hit the trail." – Ashley Brown, REI Co-op Journal
Riding with a buddy is another smart move – it’s safer and a lot more fun. A partner can step in if something goes wrong and share the thrill of exploring trails under the stars.
Be mindful of others on the trail. Dim your lights when passing to avoid blinding fellow riders or other trail users. Slow down, call out your presence, and give people plenty of time to react. Also, stick to the trail etiquette: yield to hikers, runners, and equestrians. Respect goes a long way in keeping the trails safe and accessible for everyone.
"Mutual respect, cooperation, and education are all necessary for maintaining trail systems, preserving trail access for all, maximizing safety and minimizing conflicts between various trail user groups." – Jim Rutberg, USA Cycling
Visibility is crucial at night. Wear reflective gear to ensure you’re easily seen by others. If you’re riding with a group, keep a safe distance between you and the rider ahead – this gives everyone enough time to react to any sudden obstacles.
Finally, stay sharp. Night riding hides hazards that would be easy to spot during the day, so staying focused is non-negotiable.
Conclusion
The right mountain bike lights can turn nighttime rides into safe and thrilling adventures. To make the most of your after-dark excursions, focus on key features like a brightness output of at least 1,000 lumens, dependable battery life, weather resistance, and a beam pattern suited to your needs.
When choosing lights, think about your riding style. For technical single tracks, you’ll want high-output systems with both handlebar and helmet mounting options. On the other hand, if you’re riding smoother trails or working within a budget, options like the Bright Eyes 1600 Lumen Helios – priced around $80 – offer solid performance without stretching your wallet.
"Choosing the right mountain bike lights is not just about lighting your path; it secures your adventures." – Magicshine
Good lighting doesn’t just illuminate the trail – it significantly lowers your accident risk and opens up more riding opportunities. To get the most out of your gear, keep batteries warm in cold weather to avoid power loss, and reduce brightness during breaks in warmer conditions to prevent overheating. Using both front and rear lights with flashing modes can further enhance your visibility on the trail, making your rides safer and more enjoyable.
For more tips on gear, maintenance, and riding techniques, check out Intermountain Bikes.
FAQs
How do I choose the right brightness level for night mountain biking lights?
When choosing the right brightness for your night mountain biking lights, it’s crucial to consider the terrain and how dark your surroundings will be. If you’re riding on urban trails or areas with some ambient light, a brightness range of 200 to 500 lumens should do the job. On the other hand, for remote or off-road trails, you’ll need 1,000 lumens or more to ensure you can see clearly and ride safely.
Brighter lights are particularly useful for spotting obstacles and navigating uneven paths, which is vital for rugged night rides. Just keep in mind that higher brightness levels tend to drain batteries more quickly. Look for a light that strikes the right balance between brightness and battery life to match your riding conditions.
What are the best ways to make my mountain bike lights last longer during night rides?
To extend the life of your mountain bike lights during night rides, opt for lights that let you adjust brightness levels. Switch to lower settings when full brightness isn’t necessary – like on smoother trails or in areas with enough ambient light. This simple adjustment saves battery power while still keeping your path well-lit.
Always start your ride with fully charged lights, but be cautious not to overcharge them, as this can affect battery health over time. For longer rides, consider bringing along a portable USB power bank. It’s a handy backup for recharging your lights if needed. Lastly, try to keep your lights and batteries at moderate temperatures, especially in colder conditions, as extreme cold can impact their performance.
Why should I use both handlebar and helmet-mounted lights for night mountain biking?
Using both handlebar and helmet-mounted lights is key to improving visibility and staying safe during night rides. Handlebar-mounted lights cast a steady, wide beam that lights up the trail directly ahead, helping you tackle uneven terrain with confidence. Meanwhile, helmet-mounted lights let you aim the beam wherever you’re looking – whether it’s around a bend or over an obstacle – giving you more control and awareness.
Together, these lights work to illuminate the path ahead while also revealing potential hazards in your peripheral vision, ensuring a safer and more enjoyable ride.