A hitch bike rack is a convenient way to transport your bikes securely outside your vehicle. Here’s a quick guide to get started:
- Check Compatibility: Measure your hitch receiver size (1.25 or 2 inches) and confirm your vehicle’s tongue weight capacity. Refer to your owner’s manual or hitch sticker for details.
- Gather Tools: You’ll need a wrench, torque wrench, screwdriver, and possibly a security tool. Ensure the rack includes all necessary hardware like bolts, washers, and pins.
- Clean the Receiver: Remove dirt or debris from the hitch receiver to ensure a smooth fit.
- Assemble the Rack: Follow the manufacturer’s instructions carefully, checking for missing or damaged parts before starting.
- Mount the Rack: Insert the rack into the receiver, align the holes, and secure it with bolts and pins. Use anti-rattle devices if needed.
- Load and Secure Bikes: Place the heaviest bike closest to the vehicle, alternate bike directions, and use straps or clamps to secure them tightly. Remove batteries from e-bikes for safety.
Pro Tip: Always test the rack for stability and take a short drive to ensure everything is secure before heading out. Regular maintenance, like cleaning and tightening bolts, keeps your rack safe and functional.
Follow these steps for a hassle-free setup and enjoy your biking adventures!
Installing a Hitch Rack
sbb-itb-9d75ae1
Tools and Vehicle Preparation
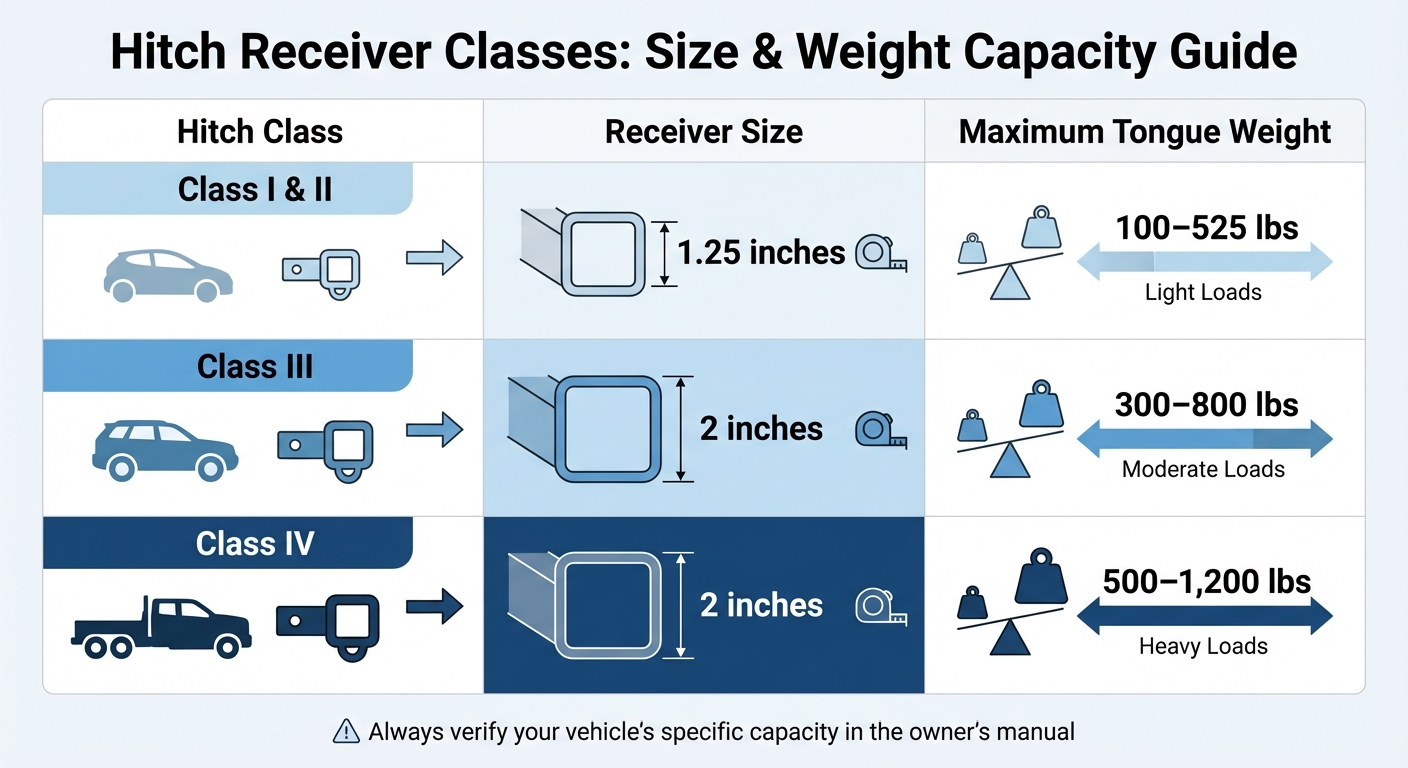
Hitch Receiver Classes Comparison Chart: Sizes and Weight Capacities
Verify Hitch Receiver Compatibility
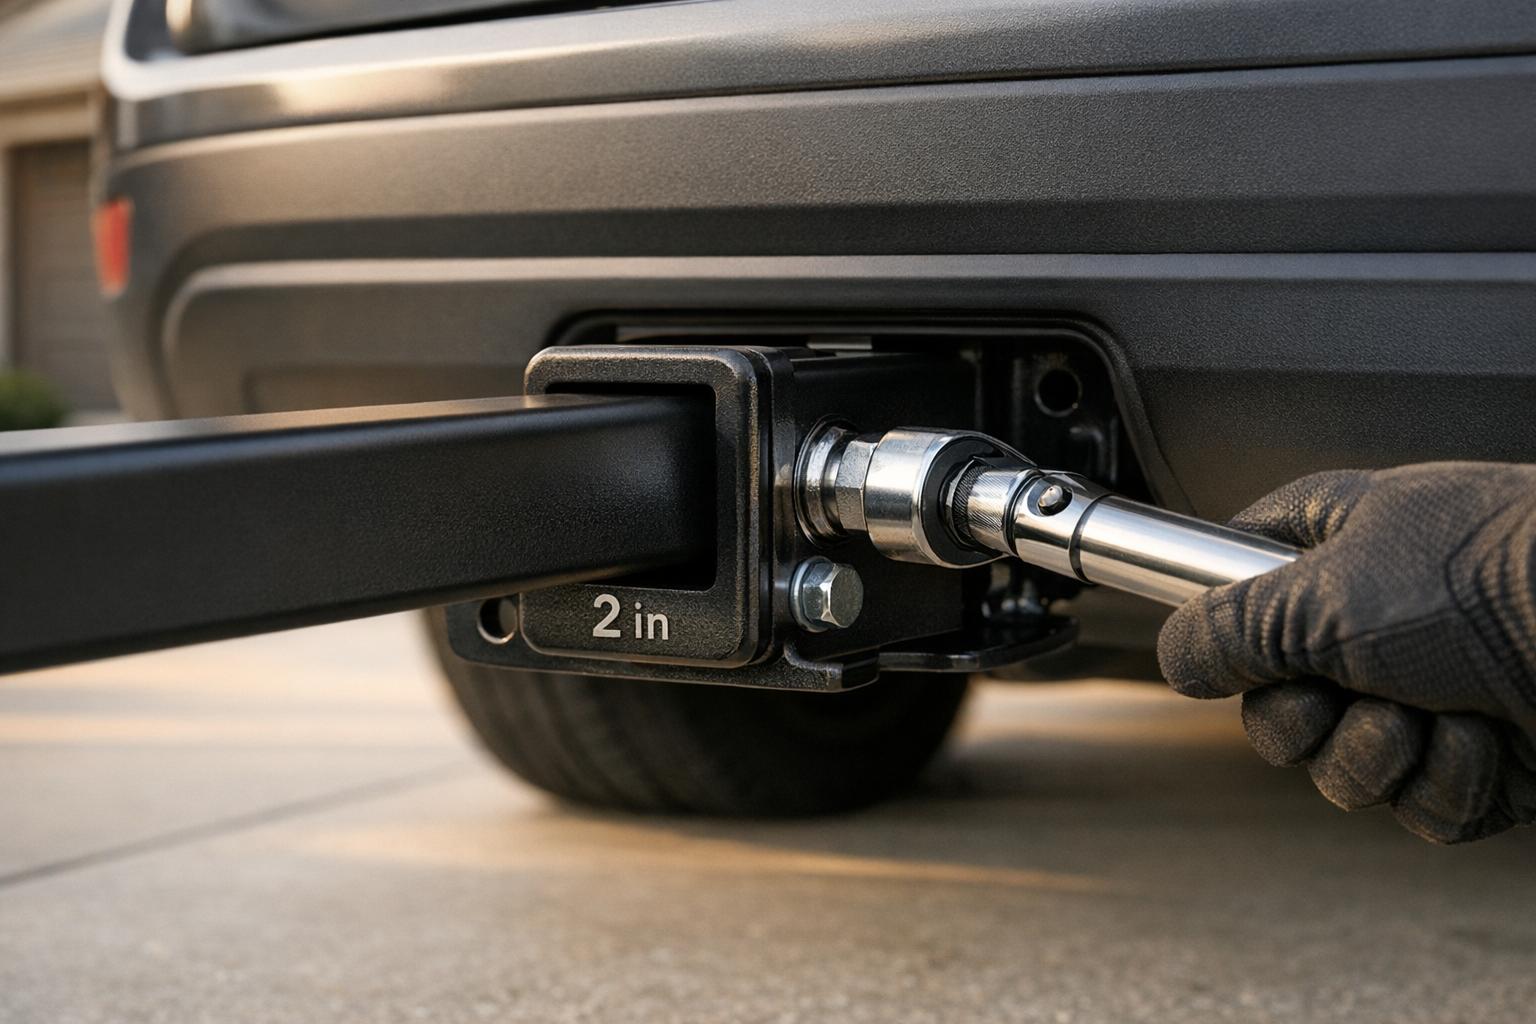
Start by measuring your hitch receiver opening. Most vehicles are equipped with either a 1.25-inch receiver (Class I and II) or a 2-inch receiver (Class III and IV). This square-shaped mount is typically located at the rear of your vehicle, just below or behind the bumper. Many standard bike racks are designed to fit a Class III or IV receiver with a 2-inch opening. Proper measurement ensures a secure fit and avoids damage to your bikes.
Next, confirm your vehicle’s tongue weight capacity. This rating represents the maximum weight your hitch can safely support. Jeff Jenkins, a Towing Expert at U-Haul, advises:
"Check the receiver hitch tongue weight rating to make sure it is greater than the combined weight of the accessory and the gear it’s holding".
Class III hitches typically support between 300 and 800 pounds of tongue weight, while Class IV hitches can handle 500 to 1,200 pounds. You can find this information either in your vehicle’s owner’s manual or on a sticker near the hitch.
| Hitch Class | Receiver Size | Typical Max Tongue Weight |
|---|---|---|
| Class I & II | 1.25 inches | 100–525 lbs |
| Class III | 2 inches | 300–800 lbs |
| Class IV | 2 inches | 500–1,200 lbs |
Once you’ve verified compatibility, gather the tools you’ll need for installation.
Required Tools
Having the right tools will make the installation process much easier. You’ll need a wrench or ratchet set and a torque wrench for precise tightening. A screwdriver and measuring tape will also come in handy. Additionally, ensure the bike rack includes all necessary hardware, such as a hitch bolt, lock washer, flat washer, and a cotter or hitch pin. Some racks designed with extra security features may require proprietary tools, like a specialized security wrench for anti-theft bolts. Basic tools can be found at most hardware stores or auto parts retailers like AutoZone.
Clean and Locate the Hitch Receiver
Find the receiver under the rear bumper and clear away any debris. Use a cloth or brush to clean the inside of the receiver tube, as accumulated dirt can make it difficult to slide the rack in smoothly or may cause it to stick over time. If your rack’s hitch bar has protective covers or stickers, remove them before installation. To prevent corrosion, clean the receiver every two weeks.
Assembling the Bike Rack
Inspect All Components
Once your tools are ready and you’ve confirmed compatibility with the receiver, it’s time to assemble your bike rack. Start by opening the box and carefully inspecting all components for any damage like dents, scratches, rust, or wear. Lay everything out on a clean, flat surface for easy access and visibility.
Check each part against the parts list in your manual. You should find key components like the hitch bracket, support column, carry arms or trays, clamps, straps, bolts, washers, and pins. The Haul Master Owner’s Manual provides this important reminder:
"When unpacking, make sure that the bike rack is intact and undamaged. If any parts are missing or broken, please call 1-888-866-5797 as soon as possible".
If you don’t have the manual, download a digital version from the manufacturer’s website before proceeding. Safety is key here – wear ANSI-approved safety goggles and heavy-duty work gloves while handling the components. Once you’ve confirmed that all parts are accounted for and in good condition, you’re ready to begin assembly.
Follow the Assembly Instructions
To keep things organized, sort the hardware by size and the order in which you’ll need it. Assembly typically takes between 30 and 45 minutes. Most racks follow a similar process: start with the hitch assembly, attach the center post, add the cross supports, and finish with the tire baskets or arms.
When tightening bolts, begin by hand to prevent cross-threading. Once everything is in place, use a wrench to tighten according to the torque specifications in your manual. For example, VelociRAX advises:
"Tighten the nuts to 7 ft lbs. DO NOT OVERTIGHTEN! This will deform the bar".
This is especially important for hollow crossbars, which can be damaged if over-tightened.
If your rack includes anti-rattle devices or hydraulic dampers, be sure to install them as instructed. Since most hitch racks weigh between 40 and 50 lbs, consider asking for help to prevent injury during assembly. With the rack fully assembled, you’re ready to move on to mounting it securely onto your vehicle.
Mounting the Rack to Your Vehicle
Insert the Rack into the Receiver
Lift the assembled rack and slide its shank into the hitch receiver, making sure the hole in the rack’s shank aligns with the hitch pin hole on the receiver. Hitch racks typically weigh between 40 and 50 pounds, so if you can, grab a friend to help you lift and position it – it’s better than risking back strain.
Before inserting the rack, double-check that the receiver is clean. Dirt, debris, or even stickers on the shank could cause the rack to get stuck inside the receiver. For safety, ensure the hitch bar ball goes in at least 2 inches deep. As SUPER73 points out, "Silver ball should not stick out front of receiver". Using a level during this step can help you confirm the rack is perfectly horizontal.
Once the rack is fully inserted and aligned, you’re ready to secure it with bolts and pins.
Tighten Bolts and Insert Pins
After confirming that the rack is aligned properly, secure it by following these steps:
- Insert the hitch bolt through the aligned holes, adding any supplied lock or flat washers.
- Tighten the bolt firmly using a wrench – don’t rely on hand-tightening, as it won’t provide the necessary stability. Some racks, like those from 1UP USA, come with a specialized security wrench for their unique hitch bolts.
- After the bolt is tightened, insert a cotter pin, clip, or hitch pin to lock everything in place and reduce vibration. If your rack has a locking hitch pin, slide it through and attach the lock head to discourage theft.
It’s a good idea to periodically check and tighten the security hitch bolt, especially during long trips, as vibrations on the road can cause it to loosen over time.
Check for Stability
Once the bolts are tightened, test the rack to ensure it’s completely stable before loading your bikes. Give the rack a firm shake to check for any movement, and inspect all bolts, washers, and pins to confirm they’re secure. If you notice any wobbling, consider the advice of U-Haul Towing Expert Jeff Jenkins:
"Check the accessory regularly to make sure the trailer hitch adapter is secure and the cargo strap is still in place".
If the rack still moves after tightening everything, you might want to use an anti-rattle or anti-tilt device to eliminate any play in the receiver. To be extra sure, take a short test drive with the empty rack. Listen for unusual rattling or shifting noises, and stop after a few minutes to re-check all connection points. It’s not uncommon for initial vibrations to cause minor loosening.
Adjusting Rack Components
With the rack mounted securely, adjusting its components is key to ensuring stability and a proper fit for your bikes.
Start by unfolding the support arms or trays and locking them into position for use. If your rack has color-coded levers, rotate them 90° to switch the arms from storage to loading mode.
For hanging racks, move the cradles along the arms to match your bike’s frame size. With platform racks, adjust the wheel holders or trays to align with your bike’s wheelbase. Some vertical racks come equipped with tire baskets designed for specific needs, such as fat tires or smaller tires, to provide a snug fit. Before hitting the road, test-fit your bikes to confirm everything is spaced correctly.
If your rack includes anti-rattle devices, tighten the anti-rattle bolts right away to minimize side-to-side movement. Aim for 25 ft-lbs of torque or tighten until secure. On some premium racks, you’ll also find a secondary locking knob that needs to be tightened against the pivot bar to eliminate any looseness during transit.
Modern hitch racks typically offer three positions: folded up against the vehicle for storage, horizontal for transport, and tilted down for rear cargo access or liftgate use. To adjust these positions, pull the release bar or handle while lifting or pivoting the rack into place. Ensure the locking pins engage by giving the rack a firm push and pull.
Before loading, remove e-bike batteries, front fenders, or baskets to avoid interference. If your rack has hydraulic dampers, check that the damper pins are engaged before lowering the rack – this prevents it from dropping too quickly under the bikes’ weight.
With these adjustments complete, you’re ready to load and secure your bikes for the journey.
Loading and Securing Bikes
Load Bikes onto the Rack
Once your rack is set up and adjusted, it’s time to load the bikes. Start by placing the heaviest bike closest to your vehicle – this helps reduce stress on the hitch. For hanging racks, center each bike on the arms to maintain balance. If you’re using a platform rack, make sure the wheels are securely seated in the trays before locking the clamps in place [17, 3].
When loading more than one bike, alternate the direction each bike faces – like having the first bike face left and the second face right. This helps avoid handlebar clashes and reduces frame contact [17, 3]. To keep your bikes protected during the trip, consider using foam sleeves or pool noodles at contact points to prevent scratches [17, 3]. If you’re transporting e-bikes, remove the batteries before loading. This not only reduces weight but also helps prevent shifting while on the move.
Fasten Straps and Clamps
Once your bikes are positioned, secure them tightly. For platform racks, press the telescoping bar clamps (or frame hooks) firmly over the wheels or the highest point of the bike frame [6, 21]. Use straps to thread through the wheel spokes, tightening them until the tires sit snugly against the tray [19, 21]. If you’re using a hanging rack, anti-sway straps are essential – they secure the bike’s seat tube and prevent unwanted swinging into your vehicle or other bikes.
For added stability, secure the front wheel with a Velcro cinch strap, attaching it to the downtube to stop it from rotating. Tighten any threaded knobs on cradles or trays by hand to ensure all components are firmly in place. To protect your bike’s finish, check that all rubber padding on the clamps is in good condition – this is especially important for carbon frames [18, 21].
Perform Final Safety Checks
Before hitting the road, give everything a final once-over. Shake the bikes and the rack to ensure there’s no movement [2, 3]. Double-check that all straps, clamps, and Velcro fasteners are tightened properly.
Take a short test drive to listen for any rattling or shifting. Afterward, re-check all fasteners to ensure everything is still secure [3, 6]. Finally, make sure the loaded bikes don’t block your taillights or license plate. If they do, consider adding an auxiliary light kit or a license plate relocation bracket to stay compliant and safe [2, 3].
Conclusion
Setting up a hitch bike rack is simple if you follow the right steps. Start by checking your hitch receiver compatibility – ensure the class and shank size align with your rack’s requirements. Clean the receiver, assemble the rack according to the manufacturer’s instructions, and securely insert it into the hitch. Use a wrench to tighten the bolt and secure it with a cotter pin or lock to keep it in place.
After installation, test the rack’s stability by shaking it and checking for movement. Take a short test drive to listen for any rattling, then double-check all fasteners. As U-Haul towing expert Jeff Jenkins emphasizes:
"Check the receiver hitch tongue weight rating to make sure it is greater than the combined weight of the accessory and the gear it’s holding".
Once you’re confident in the setup, routine maintenance is essential for safe operation. Periodically inspect and tighten the hitch bolt, and look for signs of wear or corrosion on the hardware. Always follow the manufacturer’s guidelines, and for e-bikes, remove the batteries to reduce weight and avoid potential damage.
FAQs
Do I need a hitch adapter for my rack?
When deciding if you need a hitch adapter, it all comes down to the size of your vehicle’s hitch receiver and whether it matches your rack. Many racks are designed to fit 2-inch receivers found on Class III or IV hitches. However, if your hitch receiver measures 1.25 inches, you’ll likely need an adapter or sleeve to make it work. To keep everything secure, especially when using an adapter, consider adding an anti-tilt device or locks. These tools help minimize wobble and improve overall safety.
How can I stop my hitch rack from wobbling?
To keep your hitch rack from wobbling, make sure the hitch bolt is tightened properly and the rack is firmly installed. If there’s still some looseness, try using a shim – like a piece cut from an aluminum can – to fill any gaps. If the issue continues, you might want to invest in an anti-rattle stabilizer or a similar tool to lock the rack in place and reduce movement.
Can I carry e-bikes on a hitch rack safely?
Yes, you can safely transport e-bikes using a hitch rack, as long as you select one that can handle the extra weight of electric bikes, which typically range from 55 to 90 pounds. Hitch-mounted racks are a solid choice because they offer better stability and higher weight capacities. For added safety, you might want to remove the bike’s battery to lighten the load and make sure you’re using proper loading techniques.