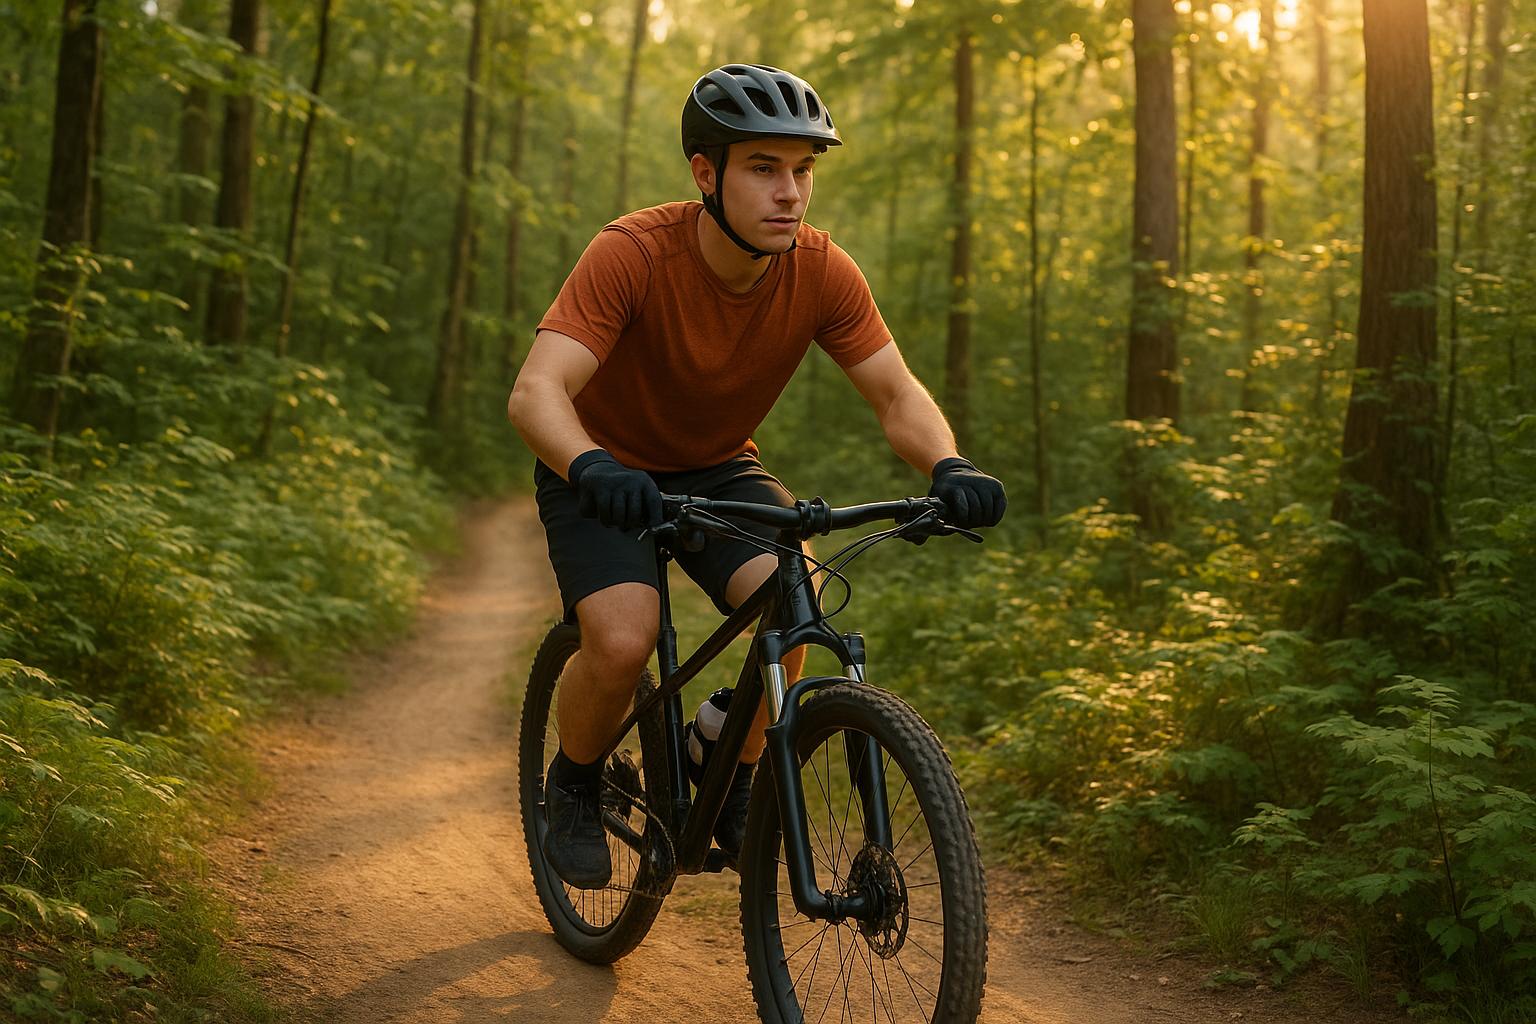
Looking to dive into mountain biking? Here’s a quick guide to help you hit the trails confidently:
- Health Benefits: Mountain biking is a low-impact, full-body workout that burns about 300 calories in 30 minutes. It also reduces stress and boosts mental well-being.
- Bike Choice: Start with a hardtail bike ($500–$1,500) for affordability and skill-building. For tougher trails, consider full-suspension bikes starting at $1,500.
- Essential Gear: Always wear a helmet with MIPS ($80–$150), gloves, and knee pads for safety. Carry a repair kit, water, and emergency supplies.
- Beginner Tips: Start on flat, smooth trails (green-rated), learn basic bike control, and practice shifting, braking, and cornering techniques.
- Trail Etiquette: Yield to hikers, horses, and uphill riders. Stick to marked trails and avoid damaging muddy paths.
Quick Comparison: Bike Types
| Type | Best For | Price Range | Key Features |
|---|---|---|---|
| Hardtail | Beginners, XC trails | $500–$1,500 | Lightweight, simple maintenance |
| Full-Suspension | Technical trails | $1,500+ | Comfort, control on rough terrain |
| Downhill | Steep descents | $4,000+ | 160mm+ suspension travel |
Mountain biking is all about fun, fitness, and adventure. Let’s gear up and ride!
Getting Started In Mountain Biking | Beginners Guide To MTB
How to Pick Your First Mountain Bike
Choose a mountain bike that fits your riding goals and budget, which can range from $500 to over $3,500.
Beginner Mountain Bike Options
If you’re just starting out, a hardtail bike is a great option. Here’s why:
- Lower price: Hardtails are $1,000–$1,500 cheaper than full-suspension bikes.
- Simpler maintenance: Fewer moving parts mean less upkeep.
- Lighter weight: On average, they’re about 3.3 lbs lighter.
- Skill-building: Ideal for learning proper riding techniques.
For riders tackling more technical trails, full-suspension bikes provide extra comfort and control, with entry-level models starting at $1,500.
Bike Size Guide
Getting the right frame size is key for both comfort and control. While height is a good starting point, factors like torso length and flexibility also matter.
| Rider Height | Recommended Frame Size |
|---|---|
| 4’10" – 5’2" | XS (13-14) |
| 5’3" – 5’6" | S (15-16) |
| 5’7" – 5’10" | M (17-18) |
| 5’11" – 6’1" | L (19-20) |
| 6’2" – 6’4" | XL (21-22) |
If you prefer more stability on descents, consider sizing up. For tighter, more technical trails, sizing down can provide better handling. Always test ride the bike to ensure the fit feels right – check arm reach and knee bend while pedaling.
Bike Types by Trail Use
The type of bike you need depends on the trails you’ll ride:
- Cross-Country (XC): For XC trails, a lightweight hardtail with 100-120mm front suspension is ideal. Entry-level models range from $500 to $1,500.
- Trail Riding: For mixed terrain, look for bikes with 120-140mm suspension travel. Mid-range options cost $2,000–$3,000 and may feature carbon frames with basic components or aluminum frames with higher-end parts.
- Downhill: These full-suspension bikes have 160mm+ travel and start at $4,000. They’re not recommended for beginners.
Key Features to Consider
When choosing your bike, keep these factors in mind:
- Frame Material: Aluminum offers excellent durability and value, making it a solid choice for beginners.
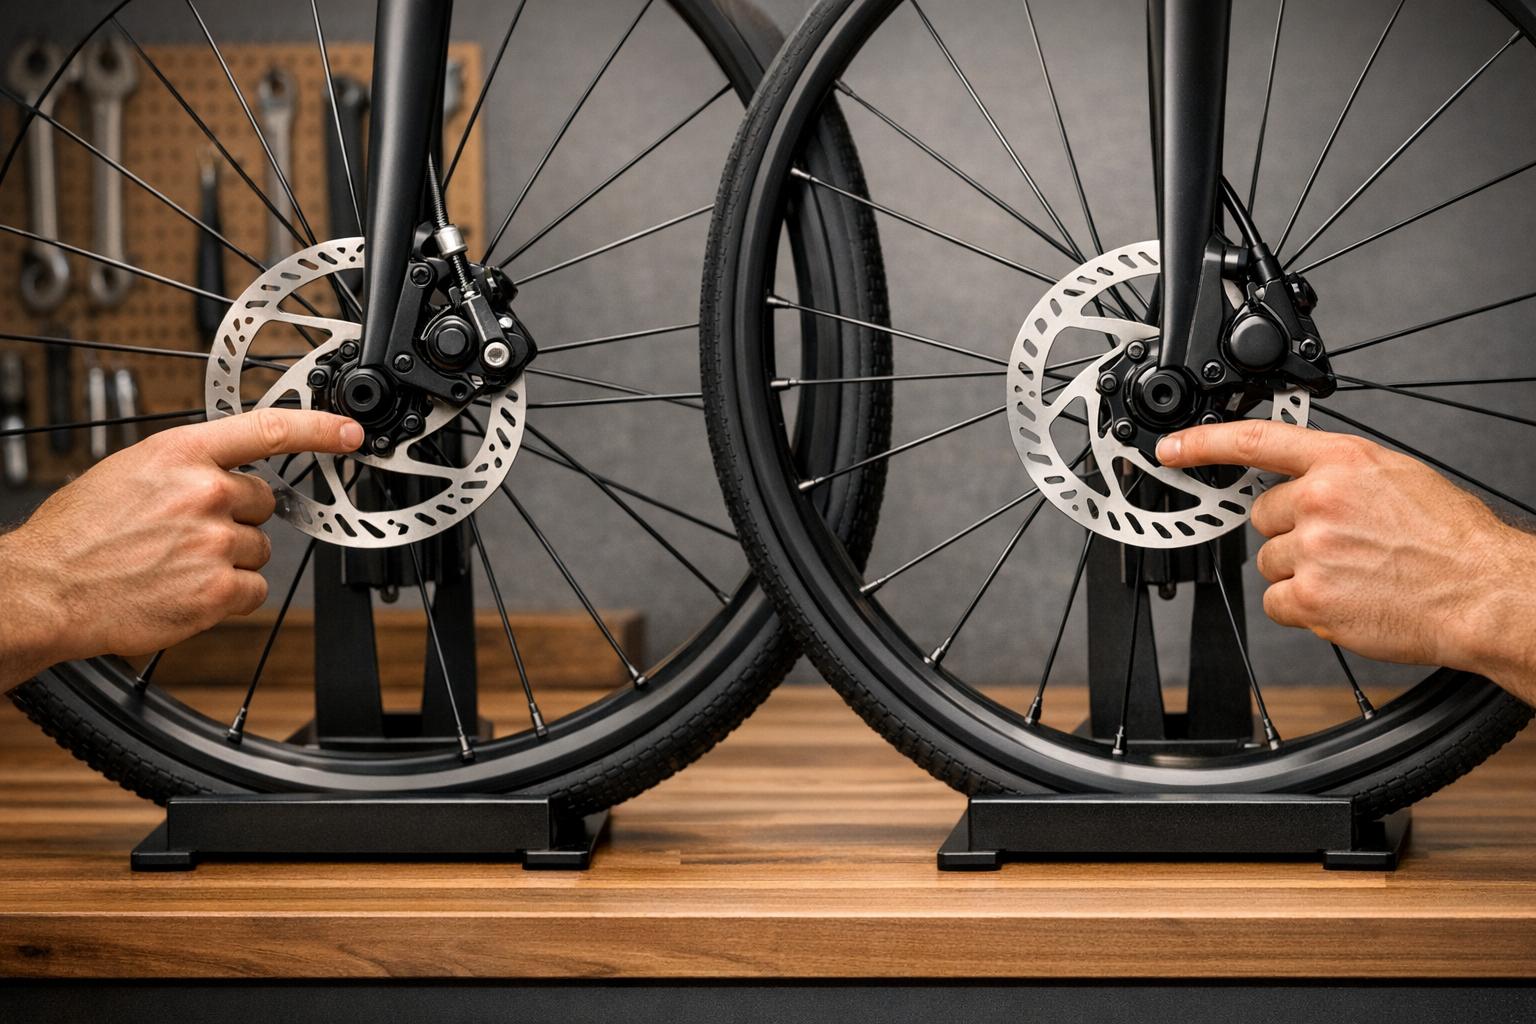
- Wheel Size: 29-inch wheels help roll over obstacles more smoothly, while 27.5-inch wheels provide quicker, more responsive handling.
- Brakes: Disc brakes are the preferred option for consistent stopping power, outperforming rim brakes.
Once you’ve selected your bike, make sure to gear up with the essentials for safe riding.
Required Gear for New Riders
Safety Equipment List
A helmet with MIPS (Multi-directional Impact Protection System) can cut the risk of head injuries by up to 50%. Make sure it fits properly for maximum protection.
| Equipment | Purpose | Price Range | Key Features |
|---|---|---|---|
| Trail Helmet | Protects your head | $80-150 | MIPS technology, good ventilation |
| Riding Gloves | Improves grip, protects hands | $25-45 | Full-finger design, padded palms |
| Eye Protection | Shields from debris & sun | $45-200 | UV protection, interchangeable lenses |
| Knee Pads | Protects knees from impacts | $40-80 | Flexible for easy pedaling |
What to Wear When Riding
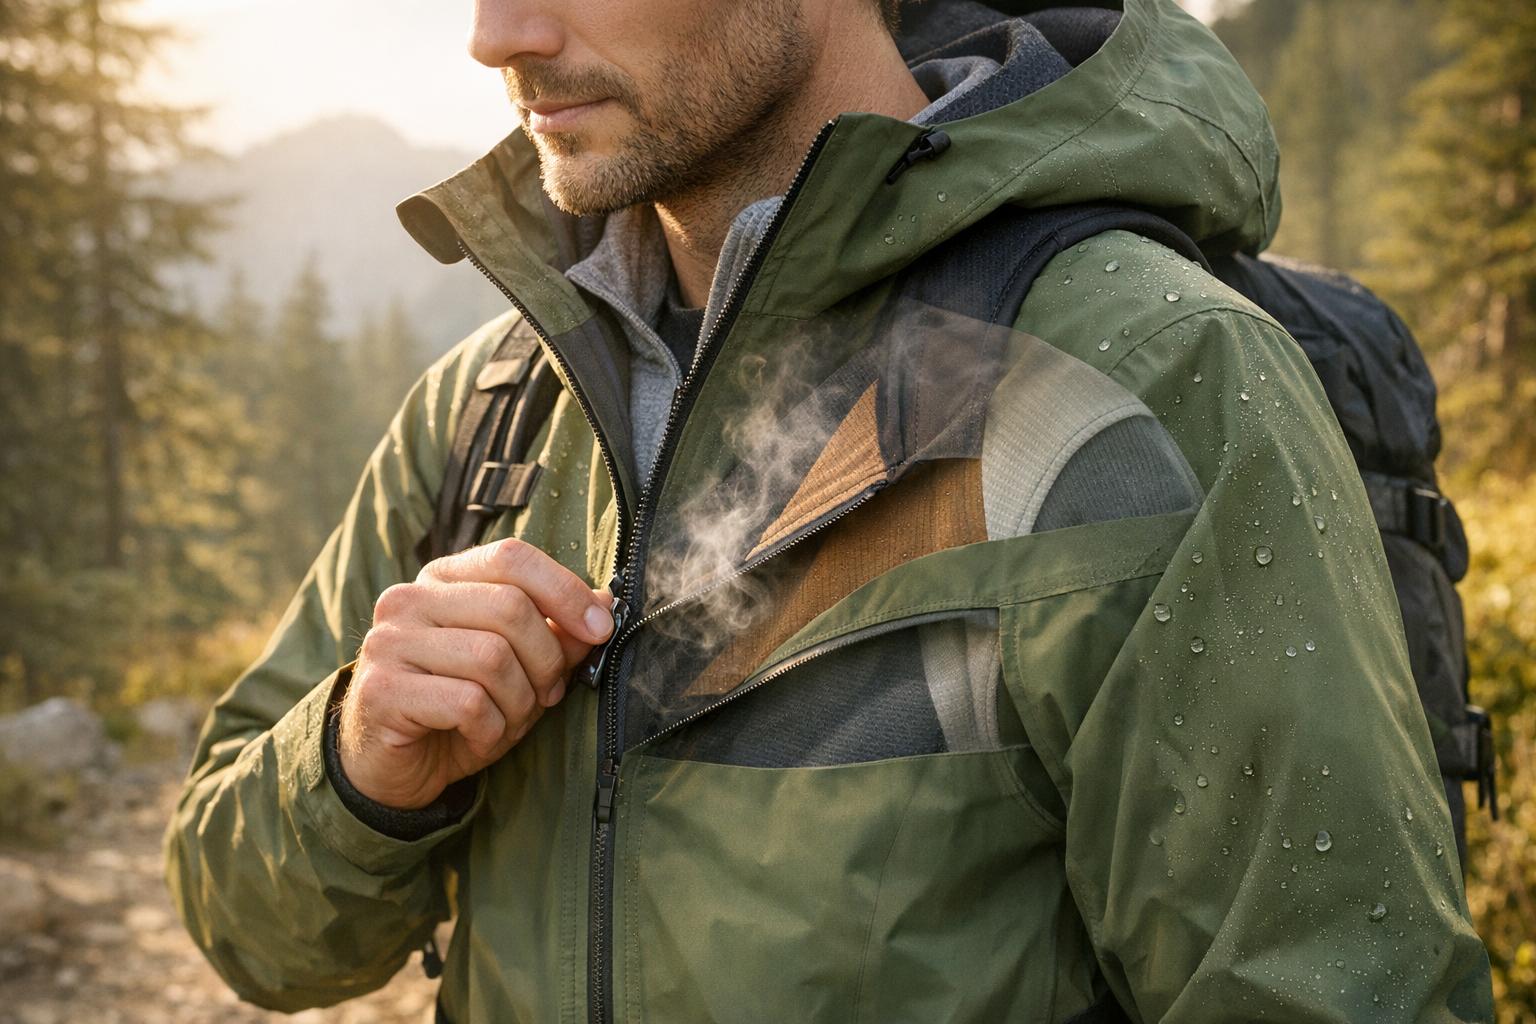
Stay comfortable and dry by choosing moisture-wicking base layers. Outer layers should be durable and allow for unrestricted movement.
Key clothing items to consider:
- Jersey: Opt for loose-fitting mountain bike jerseys for better airflow and added protection.
- Shorts: Choose MTB-specific shorts with stretch panels that accommodate knee pads.
- Base Layer: Use moisture-wicking fabrics to regulate body temperature.
- Socks: Go for moisture-wicking socks that are taller than ankle height.
For colder weather, layering is essential. Add a waterproof jacket and MTB pants to keep warm and dry.
Trail Tools and Supplies
Always carry these essentials in a hydration pack to handle unexpected situations on the trail:
-
Basic Repair Kit
Includes a hand pump or CO2 inflator, a spare inner tube (even for tubeless setups), tire levers, a multi-tool with Allen wrenches, a master chain link, and zip ties. -
Emergency Items
Bring your ID, insurance card, a cell phone, basic first aid supplies, and some emergency cash. -
Additional Supplies
Pack chain lube, duct tape, a spoke wrench, and a glueless patch kit.
CO2 inflators are quicker than hand pumps, but they require practice to use effectively. Familiarize yourself with basic repairs at home so you’re prepared for any trail-side fixes. With the right gear and tools, you’ll be ready to tackle your rides confidently.
Starting Mountain Bike Skills
Basic Bike Control
When riding on level ground, keep a neutral stance – knees and elbows bent – to stay responsive to the trail and maintain control.
Most modern bikes use rear-only derailleurs, so when shifting gears, keep these tips in mind:
- Ease off pedaling pressure while shifting.
- Anticipate terrain changes and shift before you need to.
- Avoid shifting under heavy load.
- Use lower gears to make climbing easier.
For braking, apply even pressure to both brake levers at the same time. Modern disc brakes are powerful and require a light touch. Instead of slamming the brakes, pulse them gently. Once you’re comfortable with these basics, you can start improving your hill and cornering techniques.
Hill and Turn Skills
| Technique | Description | Key Points |
|---|---|---|
| Entry Position | Wide entry, level pedals | Look ahead to where you want to exit. |
| Body Position | Lean the bike, not your body | Keep your arms and legs relaxed. |
| Exit Strategy | Focus on the exit point | Gradually apply power as you finish the turn. |
"Being able to corner confidently is the key to having more fun and going faster on your mountain bike." – Liv Cycling
When climbing, shift to an easier gear before you hit the hill and shift your weight forward to maintain traction on the front wheel. For descents, lower your saddle using the dropper post. This gives you more room to shift your body behind the seat, especially on steep sections.
Balance and Trail Reading
Once you’ve worked on cornering and braking, focus on improving your balance – it’s critical for technical riding. Professional mountain biker Hans Rey emphasizes this:
"Balance is perhaps the most fundamental skill in mountain biking. Learning it is essential for low-speed technical situations."
Always scan 15–20 feet ahead to identify obstacles and plan your route. Look for loose rocks, roots, sand, and other potential hazards while keeping an eye out for other trail users.
For technical sections, adopt the ready position (also called the attack position):
- Bend your knees and elbows deeply.
- Lift your rear end off the saddle.
- Keep your back flat.
"The trick is to concentrate on where you want to go, not where you don’t. If you look over the edge of a drop, you’ll end up there. It helps me if I look three to five feet ahead of where I am."
If you’re looking to improve faster, consider attending a skills clinic or riding with experienced mountain bikers. Practice these core techniques in a controlled setting before moving on to tougher trails.
sbb-itb-9d75ae1
Trail Rules and Safety
Trail Behavior Guidelines
Knowing how to behave on the trail helps ensure everyone’s safety and keeps trails open for mountain bikers. Dave Wiens, executive director of the International Mountain Biking Association, puts it simply:
"First and foremost, it’s about safety. The second is protecting access for bikes. There’s always an opportunity for conflict, and potentially losing access for all mountain bikes."
Here’s how to handle encounters with different trail users:
| Trail User | Yielding Approach | Communication Style |
|---|---|---|
| Hikers/Runners | Slow down and step aside | Offer a friendly greeting or ring your bell |
| Horses | Stop completely | Follow the rider’s instructions |
| Uphill Riders | Downhill riders yield | Wait for a safe spot to pass |
| Wildlife | Stop and give them space | Stay quiet and let them move along |
Stick to designated trails and avoid riding on muddy paths to prevent damage and erosion. Always pack out your trash – snack wrappers, water bottles, everything.
Trail Safety Steps
Before heading out, check the trail difficulty ratings. U.S. trails often use a color-coded system:
- Green: Beginner
- Blue: Intermediate
- Black Diamond: Advanced
- Double Black Diamond: Expert-only
Keep in mind that these ratings can vary by region. To stay safe, follow these steps:
| Safety Element | What to Do |
|---|---|
| Weather Check | Look at the forecast and avoid storms |
| Trail Status | Check conditions with local bike shops |
| Visibility | Wear bright colors, especially in hunting season |
| Communication | Share your route and carry a charged phone |
| Emergency Kit | Pack first-aid supplies, tools, and water |
"The way you ride today shapes mountain bike trail access tomorrow."
– Big South Fork National River & Recreation Area (U.S. National Park Service)
For remote rides, always let someone know your route and expected return time. During hunting season, wearing bright or blaze orange clothing is a must. Roland Czuday, product manager for e-bikes at Cannondale, adds:
"The stronger participant should yield to the one that’s weaker."
Stay alert for trail markers and respect all posted signs, including closures. If a trail crosses private property, stick to marked paths and follow local rules. And if you hit a section that’s beyond your skill level, don’t hesitate to walk your bike through – it’s always better to be safe.
Bike Care and Fixes
Taking care of your bike is just as important as honing your trail skills. Regular maintenance ensures your rides stay safe and smooth, letting you focus on the adventure instead of unexpected breakdowns.
Regular Bike Care
A well-maintained bike starts with quick, pre-ride checks. These only take a few minutes but can make a huge difference:
| Check | Target Range | Importance |
|---|---|---|
| Tire Pressure | 20-35 PSI (adjust based on weight) | Prevents flats and boosts grip |
| Chain Lube | Clean with a light shine | Cuts down on wear and noise |
| Brake Function | Firm lever feel | Ensures reliable stopping power |
| Quick Release | Tight and secure | Keeps wheels safely in place |
After especially muddy rides, give your bike a thorough cleaning to avoid long-term damage.
"Most pre-ride checks work post-ride, allowing you to address issues promptly."
Even with regular care, occasional repairs are unavoidable. Knowing how to handle them can save your ride.
Common Repairs
Basic trailside fixes are essential skills for any rider. Here are some common issues and how to handle them:
| Problem | Tools Needed | Quick Fix |
|---|---|---|
| Flat Tire | Tire levers, spare tube, mini pump | Remove the wheel, use levers to open the tire, swap the tube, and inflate |
| Slipped Chain | Multi-tool with chain tool | Guide the chain back onto the rings and inspect for damage |
| Bent Brake Rotor | Rotor truing tool | Carefully straighten it with the tool (wear gloves for safety) |
Carry a small repair kit with essentials like zip ties and a spare derailleur hanger for quick fixes on the go.
Bike Care Schedule
In addition to daily checks, sticking to a regular maintenance routine keeps your bike in top condition:
| Frequency | Tasks | Tools Needed |
|---|---|---|
| Weekly | Clean the bike, tighten loose parts | Bike cleaner, rags, basic tools |
| Monthly | Deep clean the drivetrain, check spoke tension | Degreaser, chain lube, spoke wrench |
| Every 6 Months | Inspect brake pads, check chain wear | Chain checker, brake pad gauge |
| Annually | Replace cables, service suspension | Professional service recommended |
"Regular maintenance will keep you pedaling for years." – DIY Mountain Bike
For added convenience, keep a log of your maintenance tasks. Jot down dates, completed tasks, and any issues to catch patterns early. If you’re new to bike repairs, many local shops offer maintenance classes to help you build confidence and skills.
Next Steps
Put your skills into action by making sure your bike is ready for the trails. Start with a full tune-up at your local bike shop to check that your brakes, gears, and suspension are working properly.
Finding Your First Trails
Trail apps like Trailforks or MTB Project are great for locating green-rated trails. These trails typically have smooth surfaces and gentle slopes, making them perfect for building confidence.
Building Skills Step by Step
| Level | Focus | Actions |
|---|---|---|
| Beginner | Basic Control | Practice in parking lots, flat trails |
| Novice | Trail Reading | Green trails, small obstacles |
| Intermediate | Technical Skills | Attend skills clinics, join group rides |
Move on to the next level as you grow more confident. Riding with experienced cyclists can help you refine the techniques you’ve learned.
"Ride with people who are at varying skill levels. Riding with better riders has pushed me and given me an opportunity to ask questions or copy things they do. Likewise, riding with less experienced riders has given me the chance to actually quantify my own progress. Nothing helps learning retention like teaching someone else."
– Matt, Seattle
Community Connection
Get involved with your local IMBA chapter to meet other riders, attend skills clinics, or join group rides. These groups also host:
- Skills clinics
- Group rides
- Trail building events
Regional organizations like the Southern Off-Road Bicycle Association and Mid-Atlantic Off-Road Enthusiasts can offer even more resources.
Skill Development Resources
Look into local training courses for a structured way to improve your skills. Start with the basics and work your way up to more technical challenges as your confidence increases.
FAQs
What’s the difference between hardtail and full-suspension mountain bikes, and how do I choose the right one?
The main difference between hardtail and full-suspension mountain bikes is in their suspension design. Hardtail bikes have a suspension fork in the front but no rear suspension, making them simpler, lighter, and often more affordable. Full-suspension bikes, on the other hand, have both front and rear suspension, offering more comfort and control on rough terrain.
Hardtail bikes are great for beginners, riders on a budget, or those who plan to stick to smoother trails or cross-country riding. They’re also more efficient for climbing and require less maintenance. Full-suspension bikes, however, shine on technical trails, downhill routes, and rough terrain. They provide better traction, control, and comfort, making them ideal for riders seeking a smoother ride or tackling more challenging trails.
When deciding, consider your budget, the type of terrain you’ll ride most often, and your personal riding goals. If you’re just starting out or riding smoother trails, a hardtail might be the best option. For rougher trails or more advanced riding, a full-suspension bike could be worth the investment.
What are some common mistakes new mountain bikers make, and how can I avoid them?
New mountain bikers often make a few key mistakes that can affect their safety and enjoyment. Common errors include choosing the wrong type or size of bike, skipping essential safety gear like helmets, starting with trails that are too advanced, and not pacing themselves properly.
To avoid these issues, make sure to select a bike that fits you well and is suited to the type of trails you’ll be riding. Always wear a helmet and consider additional protective gear like gloves and knee pads. Start with beginner-friendly trails and gradually challenge yourself as your skills improve. Focus on maintaining proper body position, keeping your eyes on the trail ahead, and building momentum to navigate obstacles more smoothly.
By taking these steps, you’ll set yourself up for a safer and more enjoyable mountain biking experience!
What’s the best way to maintain my mountain bike so it stays in great condition and performs well on the trails?
To keep your mountain bike in top shape, follow a simple maintenance routine. Before each ride, check the tire pressure, test the brakes, inspect the chain, and ensure quick-release levers or thru-axles are secure. These quick checks can prevent bigger issues on the trail.
After every ride, clean your bike, especially if it’s muddy. Use low-pressure water and a soft brush to avoid damaging components, then dry it thoroughly. Lubricate the chain and pivot points, and check for loose bolts or visible wear on tires and brake pads.
For long-term care, clean and lubricate the drivetrain regularly, and replace the chain every 2,000 miles or as needed. Inspect brake pads and cables for wear, and make sure your suspension is functioning properly. Consistent maintenance will help your bike perform better and last longer, giving you a smoother and safer ride.