Mountain biking in unpredictable weather can be challenging but manageable with the right preparation. Here’s what you need to know to stay safe, comfortable, and keep your bike in top shape:
- Gear Up: Invest in waterproof jackets, gloves, and shoe covers. Add mudguards, waterproof backpacks, and helmet covers for extra protection.
- Stay Visible: Use bright lights (1,000+ lumens), reflective gear, and avoid low-visibility trails without proper lighting.
- Layer Smartly: Start with a moisture-wicking base layer, add an insulating mid-layer, and finish with a waterproof outer layer. Keep your hands, feet, and head protected.
- Adjust Riding Style: Lower tire pressure for better grip, brake gently, and avoid muddy trail centers. Slow down in poor visibility.
- Post-Ride Maintenance: Clean and dry your bike and gear immediately. Lubricate the chain and inspect components for wear.
- Know When to Stop: Watch for lightning, hypothermia signs, or dangerous trail conditions. Always have a backup plan.
Preparation is key. Equip yourself with the right gear, adjust your riding techniques, and prioritize safety to enjoy biking in any weather.
7 Hacks For Mountain Biking In The Rain
Weatherproof Gear for Mountain Biking
Having the right gear can make all the difference when you’re tackling tough trails in unpredictable weather. Reliable weatherproof equipment not only shields you from the elements but also ensures you stay comfortable and perform at your best.
Waterproof Clothing and Accessories
A good waterproof jacket is a must-have. Look for one with a breathable membrane like GORE-TEX, which keeps rain out while allowing sweat to escape – important for staying dry without overheating. Sealed seams (either taped or welded) and features like pit zips, back vents, adjustable cuffs, and hem drawcords provide extra protection and ventilation.
When it comes to pants, waterproof options with breathability are key. Many riders prefer 3/4 length or knee-length styles to protect the core areas without adding bulk around the ankles. Features like side zippers make it easier to slip them on over your shoes and pedals.
For your hands, waterproof gloves with grippy palms are essential. Adding liners can help regulate temperature. Neoprene gloves work well for cold, wet conditions but can feel too warm during intense rides.
Don’t forget about your feet. Waterproof shoe covers or specialized waterproof cycling shoes keep them dry and warm, which is critical for maintaining control on technical terrain. Look for covers with reinforced soles that can withstand rough surfaces like rocks and roots.
Now, let’s talk about gear to handle mud and water.
Protective Equipment for Mud and Water
Mudguards are lifesavers when it comes to keeping mud and grit off your body and bike. Clip-on mudguards are a flexible option – you can attach them when needed and remove them in dry conditions. For maximum protection, full-coverage fenders are ideal, though they may not fit every bike or tire size.
A waterproof backpack is another essential. It keeps spare clothes, food, and electronics dry. Opt for designs with roll-top closures, which perform better in heavy rain than zippers. Inside, waterproof compartments help separate wet and dry items for better organization.
You might not think about it, but helmet covers are incredibly useful. They keep rain from dripping down your neck, reduce wind chill, and often come with bright colors or reflective elements for better visibility. Some even feature built-in lights for added safety.
For your tools and small items, waterproof frame bags are perfect for keeping essentials like snacks, tubes, and tools dry. Sealed tool canisters also prevent rust on items like multi-tools and tire levers after wet rides.
Finally, ensuring visibility in poor conditions is crucial for safety.
Lighting and Reflective Gear
In foggy or rainy conditions, bright lights are essential. A helmet-mounted light helps illuminate where you’re looking, which is critical for navigating tricky sections. Combine it with a bar-mounted light for a broader view of the trail.
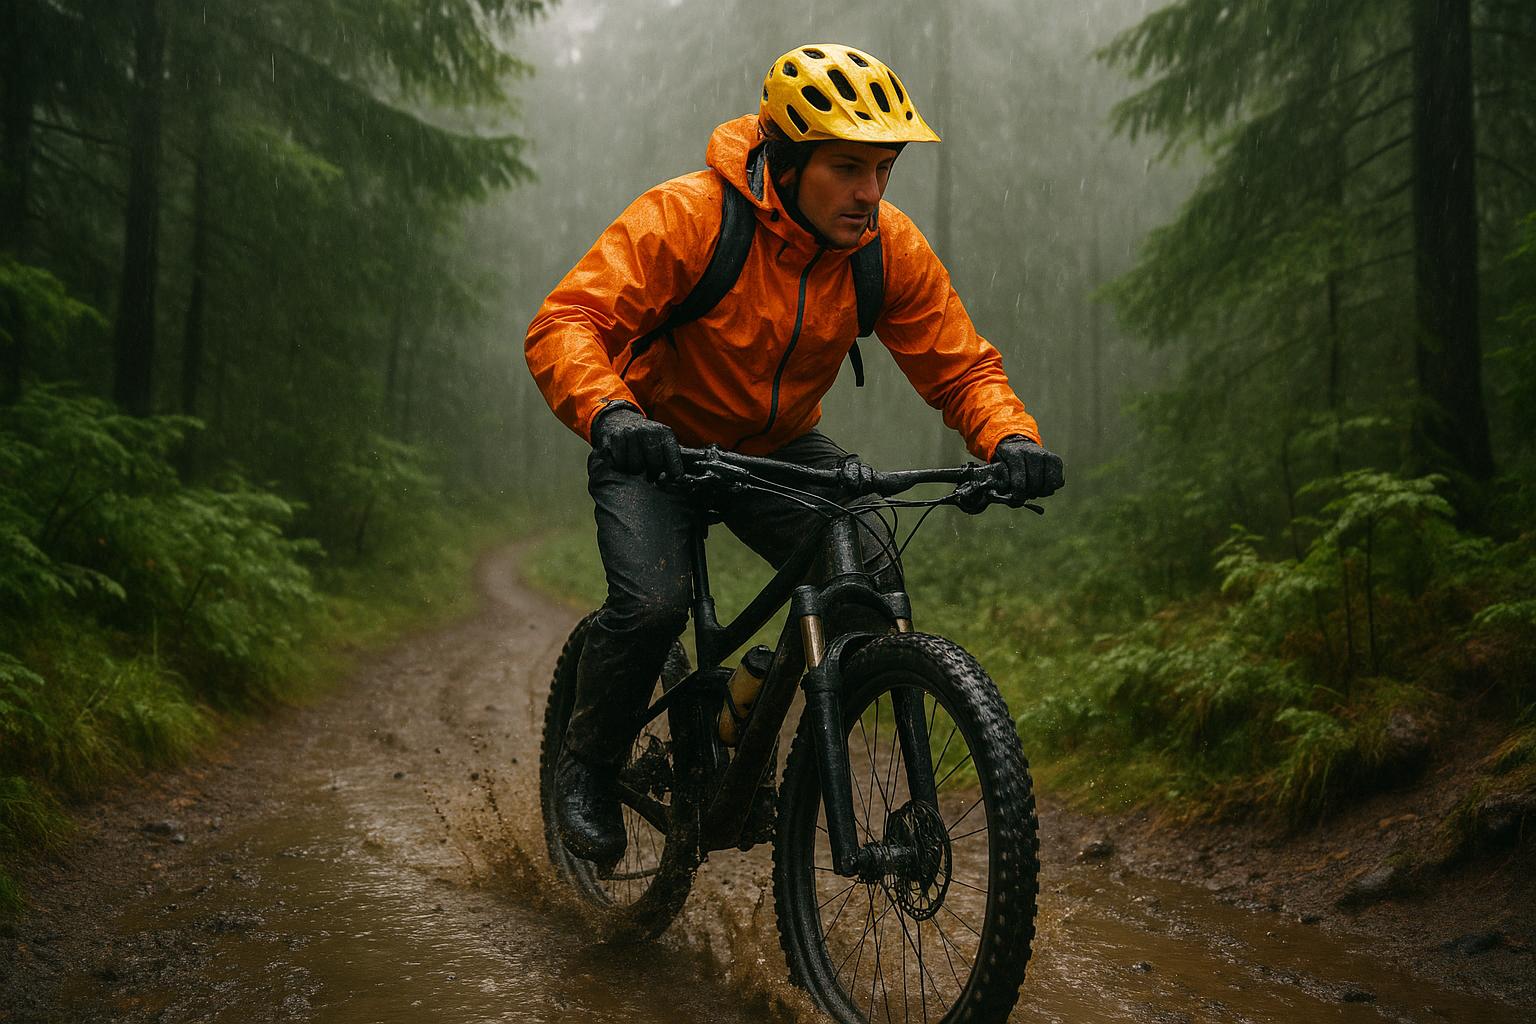
Adding reflective elements to your gear makes you much easier to spot. Think reflective tape on your helmet, reflective panels on your jacket, or reflective ankle bands. High-visibility colors like yellow, orange, or lime green also stand out against the muted tones of wet, muddy trails.
For lighting, steady beams are great for seeing trail details, while flashing modes make you more noticeable to others. Adding amber side lights provides 360° visibility in extremely low-light conditions.
Cold, wet weather can drain batteries faster, so choose USB-rechargeable lights with long run times. Carrying backup lights or extra batteries ensures you’re not left in the dark. Lights with a waterproof rating of IPX4 or higher are ideal for handling rain and trail spray. Make sure they have secure mounts to prevent them from bouncing loose on rough terrain when visibility is already limited.
Layering and Dressing for Weather Changes
Mountain weather can be unpredictable, so dressing in layers is your best bet for staying comfortable. Think of it as your personal climate control system while riding – easy to adjust as the conditions shift.
Base Layers: The Foundation of Comfort
The base layer is where it all starts. Worn directly against your skin, its main job is to wick away moisture and keep you dry. Merino wool is a popular choice because it handles moisture well, resists odors, and helps regulate temperature. Lightweight versions are great for mild conditions, while heavier options provide extra warmth when it’s cold.
Polyester blends are another solid option – they dry quickly and are budget-friendly. Look for base layers with flat seams to minimize chafing, and steer clear of cotton. Cotton holds onto moisture and loses its insulating power when wet, which can leave you feeling cold and clammy.
A snug fit ensures the base layer works efficiently without restricting your movement. Crew neck styles are versatile, but zip-neck designs can give you extra ventilation when temperatures rise.
Once your base layer is in place, it’s time to add insulation and protection to handle changing weather.
Insulation and Outer Layers: Adapting to Conditions
Your mid-layer provides insulation and is key to retaining warmth. Fleece jackets or lightweight soft-shells are excellent choices – they insulate even when damp and pack down small for easy storage. Synthetic insulation is especially useful in wet conditions, offering a good balance of warmth and weight compared to down.
For cooler weather, a lightweight fleece or soft-shell strikes a nice balance between warmth and breathability. Soft-shells, in particular, provide wind resistance and light water-repellency while staying breathable, making them ideal for variable conditions.
Ventilation is crucial when layering. A full-zip mid-layer lets you quickly release heat during uphill climbs, while outer layers with features like pit zips allow targeted cooling without removing the jacket. Small details, like thumb loops, can also keep sleeves in place as you adjust layers.
Your outer layer is your shield against the elements. Look for something waterproof and windproof that still allows moisture to escape, preventing you from overheating. Make sure it fits comfortably over your base and mid-layers without feeling restrictive.
Practical Tips for Staying Comfortable
Layering is only part of the equation – managing your gear during the ride is just as important. Start your ride feeling slightly cool, as your body heat will warm you up once you get moving. A good rule of thumb is to dress for conditions slightly warmer than they seem.
Ventilation is key to staying comfortable. Open zippers, shed a layer, or make adjustments before you start overheating. It’s much easier to stay comfortable than to recover from being damp with sweat.
Don’t forget your extremities. Neoprene shoe covers, bar mitts, and a thin beanie under your helmet can make a big difference in cold weather. For particularly frigid conditions, a balaclava provides full-face coverage while still fitting under your helmet. Look for versions with mesh panels to improve airflow and reduce fogging.
Finally, pack smart for longer rides. A lightweight compression sack is perfect for storing layers you’ve removed, and keeping frequently adjusted items within easy reach makes on-the-go changes more convenient.
sbb-itb-9d75ae1
Safety and Riding Techniques for Bad Weather
Tough weather calls for more than just sturdy gear; it demands a shift in how you ride. Familiar trails can quickly turn into tricky terrain when conditions worsen, requiring sharper skills and a more cautious approach. Whether you’re navigating slick rocks, muddy descents, or foggy paths, adjusting your riding style is key to staying safe.
Adjusting Riding Style for Terrain
When the trails are wet, a few tweaks to your setup can make a big difference. Start by lowering your tire pressure by 3–5 PSI to improve traction. If you’re running tubeless tires, you can go even lower, but be mindful of sharp corners to avoid tire roll.
Weight distribution is another crucial factor on slippery trails. On descents, shift your weight back to keep the front wheel from sliding out, but don’t neglect the front tire – it still needs enough pressure for proper steering. On climbs, lean forward more than usual to keep the front wheel grounded, especially on loose or wet surfaces.
Braking in wet conditions requires finesse. Start braking earlier and use both brakes gently to avoid locking your wheels. Feather the brakes to maintain control, as sudden braking on wet rocks or roots can lead to a skid. Practice finding the right balance of brake pressure to slow down without losing grip.
Picking the right line is critical when visibility is low or trails are muddy. Avoid the center of the trail where water and mud tend to collect. Instead, stick to the edges, where drainage is better and traction is more reliable. If you can’t clearly see what’s ahead, slow down and take conservative lines instead of charging through blind sections.
Cornering on wet trails is all about smoothness and precision. Enter turns slower than usual, and focus on gradual movements rather than sharp steering. Lean your bike more than your body to maximize tire contact with the ground. If the bike starts to slide, make small, controlled adjustments instead of panicking.
Of course, staying safe isn’t just about how you ride – it’s also about maintaining clear visibility and staying aware of your surroundings.
Visibility and Awareness
In bad weather, good lighting is a game-changer. Use headlights with at least 1,000 lumens, or go for 1,500–2,000 lumens for better depth perception in rain or fog. Mount a secondary light on your helmet to help you see around corners and scan the trail ahead independently of your bike’s direction.
Reflective gear is another must-have for poor conditions. Add reflective tape to your helmet, shoes, and bike frame to make yourself more visible to others. Check your jacket, gloves, or backpack for built-in reflective strips and position them where they’ll be most effective.
Sound becomes an important tool when visibility is limited. Rain, wind, and fog can muffle noises, making it harder to hear approaching riders, vehicles, or falling branches. Avoid wearing headphones and make it a habit to call out your presence more often when passing others.
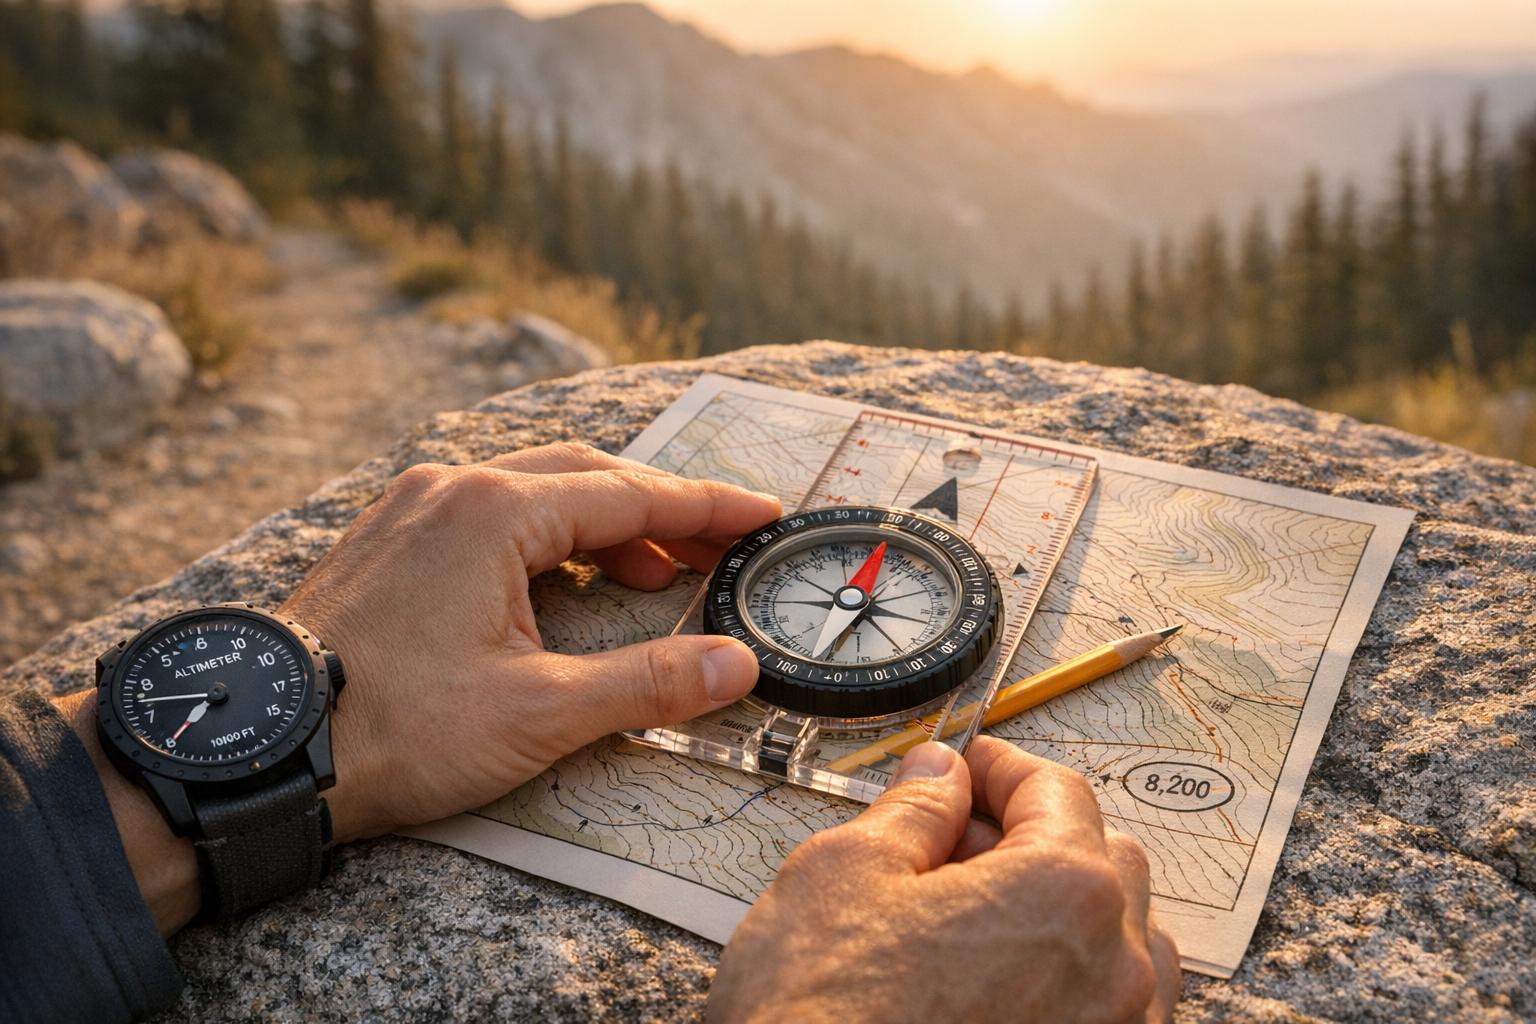
Navigation also becomes trickier in bad weather. Fog can obscure landmarks, and rain can make trail signs harder to read. Download offline maps to your phone before heading out, and bring a backup GPS device if you’re venturing into remote areas. Mark key waypoints like trail intersections or exit routes in advance.
When riding in a group, poor visibility changes the dynamics. Keep closer spacing to maintain visual contact, but leave enough room to react if someone ahead loses control. Use hand signals to warn about hazards like loose rocks, deep puddles, or tricky sections that are harder to manage in wet conditions.
Sometimes, though, the smartest move is knowing when to stop or seek shelter.
Knowing When to Stop or Seek Shelter
Lightning is one of the most serious dangers for mountain bikers caught in storms. Follow the 30-30 rule: if thunder follows lightning by 30 seconds or less, find shelter immediately and wait at least 30 minutes after the last thunderclap before resuming your ride. Avoid ridgelines, open areas, and tall, isolated trees.
A sudden temperature drop can turn a manageable ride into a dangerous situation. If you start shivering uncontrollably or lose dexterity in your hands, it’s time to find warmth and shelter. Hypothermia can impair your judgment, making it harder to recognize when conditions have become unsafe.
Trail conditions can also deteriorate to the point where continuing is no longer safe. Deep mud can damage trails, swollen water crossings can become impassable, and ice-covered paths can lead to dangerous falls. Consider the impact on the environment, too – riding saturated trails can cause lasting damage for other users.
Visibility is another key factor. If you can’t see the trail clearly for 20–30 feet ahead, it’s time to reassess. Heavy fog, rain, or fading light combined with technical terrain can lead to serious crashes. Waiting out bad visibility is often the safer choice.
Planning for emergencies is essential when riding in questionable weather. Identify potential shelter spots along your route, like trail shelters, large rock overhangs, or dense tree cover. Carry an emergency bivy or space blanket for unexpected situations where you need to wait out severe weather.
Communication is critical when conditions worsen. Let someone know your route and expected return time, and consider carrying a satellite communicator for remote rides. Cell service can be unreliable in storms, so having a backup communication method could be a lifesaver.
Post-Ride Care and Maintenance
After a wet and muddy ride, it’s crucial to clean your bike and gear as soon as possible. Neglecting this step can lead to unnecessary wear and tear, costing you money and reducing your equipment’s performance. A little effort right after your ride goes a long way in keeping everything in top shape for future adventures.
Cleaning and Drying Gear
Start with your bike while the mud is still soft and easier to remove. Use a gentle spray from a garden hose – avoid high-pressure washers, which can damage bearings and seals. Pay special attention to the drivetrain, as it collects the most grime and directly affects your bike’s performance.
Remove the wheels for better access to the frame and components. Use a soft brush to clean the cassette, chainrings, and derailleur pulleys thoroughly. Avoid spraying water directly at sensitive areas like the bottom bracket, headset, or wheel hubs, as water can seep into sealed bearings.
Clean the frame from top to bottom with warm soapy water and a microfiber cloth. For full-suspension bikes, check pivot points and remove any dirt to prevent premature wear. Wipe down fork stanchions with a damp cloth to protect the seals.
Your clothing also needs immediate attention. Turn garments inside out before washing to preserve waterproof coatings. Use a gentle soap designed for technical fabrics, as regular detergents can clog breathable membranes, reducing their effectiveness.
Never store wet gear. Hang everything in a ventilated area away from direct heat sources like radiators, which can damage waterproof coatings. For wet boots and gloves, stuff them with newspaper to absorb moisture and help maintain their shape.
For electronics like bike computers, lights, and cameras, remove the batteries and wipe everything dry. Check charging ports for debris or moisture, leaving protective covers open until fully dry.
Lubrication and Component Checks
Once your bike is clean and dry, inspect and lubricate critical parts. The chain, often the most affected by wet rides, should be your top priority. Apply fresh chain lubricant within 24 hours to prevent rust. Choose your lubricant based on the weather – wet lube for rainy conditions and dry lube for dusty trails. Apply 1-2 drops per link, then wipe off excess to avoid attracting dirt.
Inspect your brake pads for debris like small stones or metal fragments, which can damage rotors. Remove the wheels and carefully pick out any foreign material with needle-nose pliers. Replace contaminated brake pads instead of trying to clean them, as oil or other substances can compromise their performance.
Check cable housing and hydraulic brake lines for cracks or fraying. Water can seep into small openings, causing internal corrosion. Replace damaged cables before your next ride to avoid potential failures.
Suspension components also need attention after muddy rides. Wipe down fork stanchions and rear shock shafts with a damp cloth to remove grit. Look for scratches or nicks that could harm seals. If you spot any issues, schedule a service appointment before riding again.
Wheel bearings can take a beating in wet conditions. Spin each wheel and listen for grinding or rough spots. A smooth and quiet rotation indicates everything is in good shape. Check for play in the hubs by wiggling the rim side-to-side. Any movement suggests loose or worn bearings that need fixing.
With everything cleaned, dried, and lubricated, proper storage is the next step in extending your gear’s lifespan.
Storage Tips for Long-Lasting Gear
Storing your gear correctly can make a huge difference in its durability. Never store wet items in closed bags or containers, as this creates the perfect environment for mold and mildew. Even if something feels dry, moisture may linger in seams or padding.
Keep your bike in a dry, well-ventilated space. If storing it in a garage or basement, consider using a dehumidifier during humid months to prevent condensation. Hang the bike or use a stand to keep the tires off the ground, reducing the risk of flat spots and allowing air to circulate.
Lower tire pressure by 10–15 PSI before storage. This helps prevent flat spots, particularly in high-pressure road tires, though mountain bike tires also benefit.
For electronics, remove the batteries before storage. Even when turned off, devices can slowly drain power, and old batteries may leak, damaging internal circuits. Store them separately in a cool, dry place.
Clothing should be stored clean and completely dry. Follow the manufacturer’s washing instructions before putting items away, as dirt and oils can degrade fabrics over time. Hang technical garments instead of folding them to avoid creasing waterproof membranes.
Apply a light coat of frame protectant or bike wax before long-term storage to guard against corrosion. This is especially helpful for steel frames, but aluminum and carbon fiber bikes also benefit. Pay extra attention to areas where cables rub against the frame, as these spots are prone to wear.
Finally, keep a maintenance log. Record when you service components like brake pads, chains, or tires. After particularly harsh rides, note any issues so you can address them before your next outing.
Key Takeaways
When it comes to weatherproof mountain biking, preparation and flexibility are your best allies. Conditions can shift quickly, so staying ahead of the weather is essential for a safe and enjoyable ride.
- Stay informed: Keep an eye on local forecasts and trail reports. If you notice dark clouds rolling in or temperatures dropping fast, adjust your plans accordingly.
- Dress smart: Layering is key. Start with a moisture-wicking base layer, add an insulating mid-layer, and finish with a waterproof, breathable outer shell. Don’t forget to protect your hands, feet, and head with waterproof and thermal gear.
- Optimize your bike: Lower your tire pressure for better traction on slippery trails, and double-check that your brakes are reliable in wet conditions.
- Be prepared: Go beyond basic tools. Have a communication plan, know where nearby shelters are, and don’t hesitate to turn back if the weather becomes too challenging.
- Post-ride care: Clean your bike within 24 hours, apply fresh chain lubricant, and make sure everything is completely dry before storing it. This routine helps avoid costly repairs and keeps your gear ready for the next adventure.
For more advice on gear and riding techniques, check out Intermountain Bikes.
FAQs
What should I look for in waterproof biking gear to stay dry and comfortable in any weather?
When picking waterproof biking gear, pay attention to sealed or taped seams – these are key to keeping water out. Opt for breathable fabrics like GORE-TEX, which help you stay dry while preventing overheating. Features like ventilation zippers or mesh panels can also boost airflow, especially during those tough, high-energy rides.
Extras such as storm flaps, waterproof zippers, and adjustable hems offer added rain protection while ensuring the gear fits comfortably and stays in place. Aim for gear that combines durability, comfort, and practicality so you can enjoy your rides no matter how unpredictable the weather gets.
How can I adapt my mountain biking skills to handle tough weather conditions safely?
When biking in challenging weather, safety starts with smart planning. Opt for trails with reliable drainage to reduce the risk of slipping, and steer clear of severe conditions like heavy rain, storms, or strong winds. For better traction on wet or muddy paths, lower your tire pressure or switch to wider tires. If you’re tackling icy trails, studded tires can be a game-changer.
Dressing right is equally important. Choose waterproof, breathable clothing to keep yourself warm and dry, and layer up so you can adapt to shifting temperatures. Try to schedule your rides during calmer weather periods, and be cautious of shaded spots where ice or moisture tends to linger. Above all, adjust your speed and braking to match the trail conditions, keeping safety as your top priority.
How should I clean and maintain my bike after riding in wet or muddy conditions?
After a muddy or wet ride, giving your bike some TLC is essential to keep it running smoothly. Start by rinsing off mud and dirt with a garden hose, but be careful not to use high-pressure water near sensitive areas like bearings. For tougher grime, grab a bike-specific cleaner and degreaser to do the heavy lifting, then rinse everything off thoroughly.
Once your bike is squeaky clean, dry all the parts with a soft cloth to ward off rust. Don’t forget to lubricate the chain and other moving parts – this helps them stay smooth and protects against corrosion. Finally, give your bike a quick once-over. Check for things like cracks, loose bolts, or worn-out brake pads. With regular care like this, your bike will always be ready to take on your next ride, rain or shine!