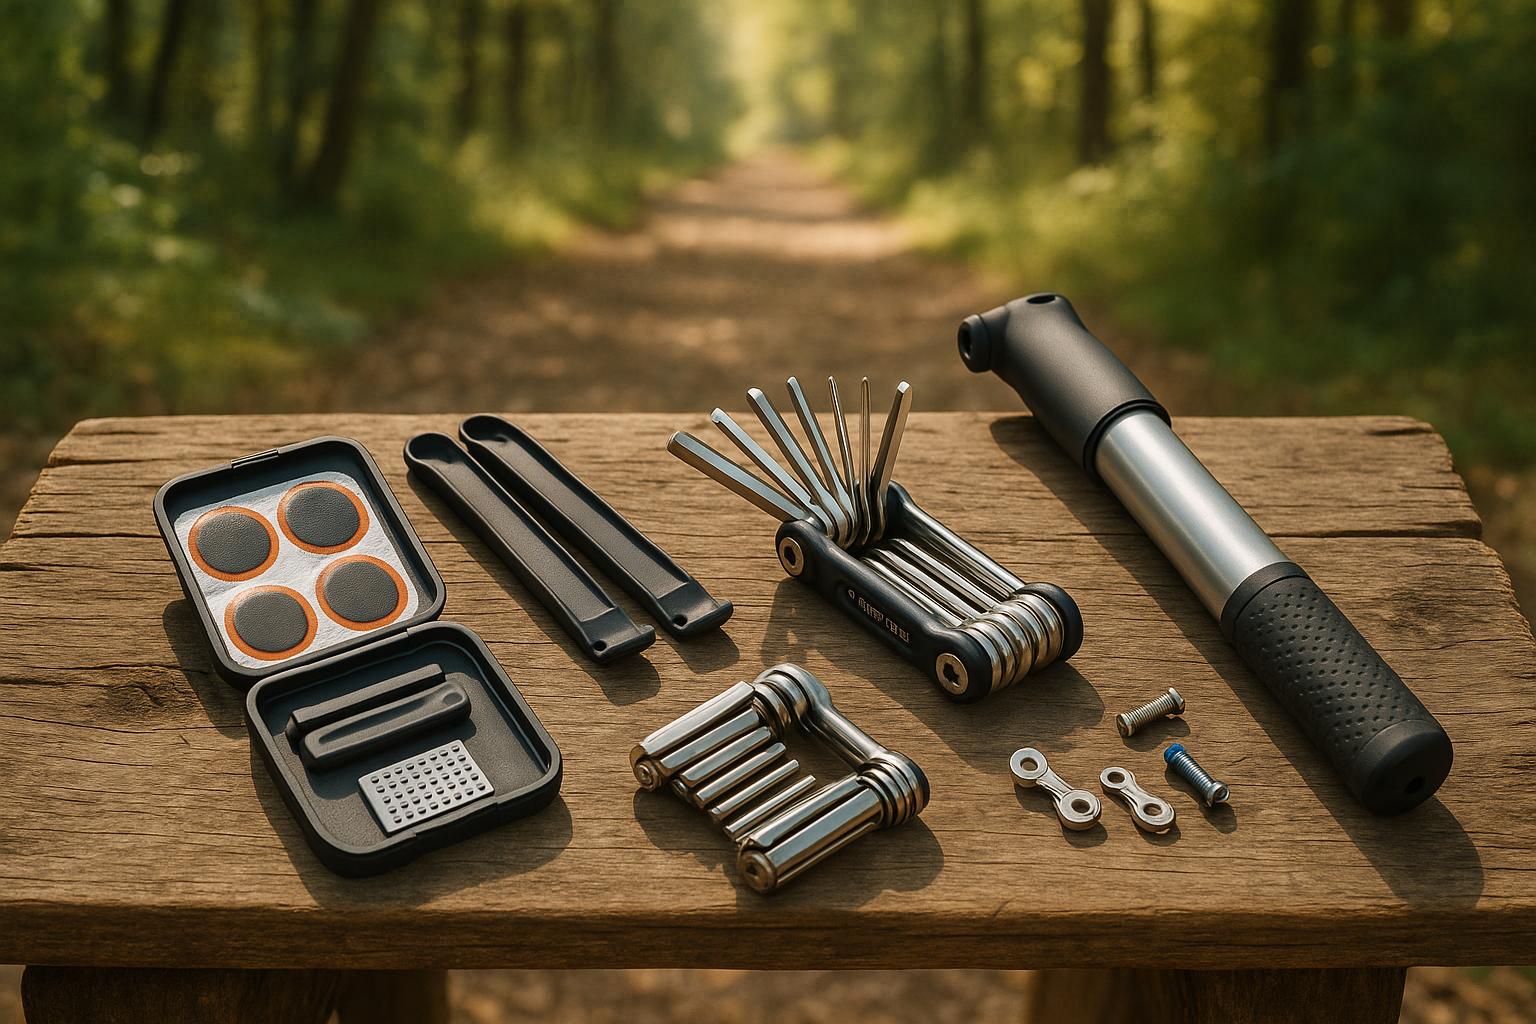
When you’re out on a trail, unexpected bike issues can ruin your ride. With the right tools, you can quickly fix common problems like flat tires, broken chains, or loose bolts and keep going. Here’s a quick list of must-have tools for trailside bike repairs:
- Tire Patch Kit: Fix flat tires with patches, tire levers, and a spare tube.
- Multi-Tool with Chain Tool: Compact device for adjustments and chain fixes.
- Portable Tire Pump: Inflate tires manually or with a CO2 inflator.
- Tubeless Repair Kit: Seal punctures in tubeless tires with plugs and sealant.
- Chain Repair Tools: Handle broken chains with a chain breaker and quick links.
- Emergency Fasteners: Use zip ties and duct tape for temporary fixes.
- Basic Wrench Kit: Tighten bolts with Allen and Torx wrenches.
- Basic Medical Kit: Treat minor injuries with bandages, antiseptic wipes, and more.
- Safety Devices: Stay safe with GPS tools and emergency communication devices.
- Spare Hanger: Replace a bent or broken derailleur hanger to protect your bike.
Quick Comparison:
| Tool | Weight | Usefulness | Key Features |
|---|---|---|---|
| Tire Patch Kit | ~2.5 oz | Fix flat tires | Patches, levers, spare tube |
| Multi-Tool | ~8.4 oz | Adjustments, chain fix | Allen wrenches, chain tool |
| Tire Pump | ~5.8 oz | Inflate tires | Manual or CO2 inflator |
| Tubeless Repair Kit | ~3.2 oz | Seal tubeless punctures | Plugs, sealant, insertion tool |
| Chain Repair Tools | ~4.1 oz | Fix broken chains | Chain breaker, quick links |
| Emergency Fasteners | ~1.8 oz | Temporary fixes | Zip ties, duct tape |
| Basic Wrench Kit | ~6.7 oz | Tighten bolts | Allen and Torx wrenches |
| Medical Kit | ~4.9 oz | Treat injuries | Bandages, antiseptic wipes |
| Safety Devices | ~3.3 oz | Navigation, SOS | GPS, personal locator beacon |
| Spare Hanger | ~1.2-2.5 oz | Replace derailleur | Model-specific hanger |
Carrying these tools ensures you’re ready for common bike issues and can safely enjoy your ride. Remember to practice using them before heading out and store everything in a waterproof bag for easy access.
What Tools You Need on a Mountain Bike Ride? | A Beginner’s Guide
1. Basic Tire Patch Kit
A tire patch kit is a must-have for handling one of the most common trail issues: a flat tire. Look for a compact kit that can handle different types of punctures.
Here’s what you’ll need in a solid tire patch kit:
- Self-adhesive patches for quick fixes
- Tire levers (at least two) to remove and replace the tire
- Sandpaper to prep the area for the patch
- Patch cement for a secure seal
- A spare tube in case the damage is too severe to patch
- A tire boot for larger cuts that patches can’t handle
Tip: Store your kit in a waterproof ziplock bag to keep everything dry and ready to use. Keep it in an easy-to-reach spot like your pack or saddlebag.
2. Multi-Tool with Chain Tool
A multi-tool packs essential repair tools into one compact device, and its built-in chain tool can handle broken chains while you’re out riding.
Key Features to Look For:
- 2mm–8mm Allen wrenches: Perfect for adjusting seat posts, handlebars, and other components.
- Phillips and flathead screwdrivers: Useful for tweaking derailleurs.
- Torx T25 wrench: Handy for maintaining disc brakes.
- Chain tool with pin press: Designed for quick chain repairs.
How to Use the Chain Tool
To fix a chain, place the broken link in the tool’s cradle. Align the pin press with the chain pin, then turn the press until the pin is pushed out. To reconnect, press the pin back into place until it sits evenly with the chain.
Helpful Tips
- Make sure your multi-tool includes all the wrench sizes you might need.
- Keep it in an easy-to-reach spot in your pack for quick access.
- Clean and lightly oil the tool to prevent rust.
- Practice using the chain tool at home so you’re confident when you need it on the trail.
While a multi-tool isn’t meant for big repairs, it’s a must-have for quick fixes and adjustments during your ride. Up next, be ready to tackle tire pressure problems with a portable pump.
3. Portable Tire Pump
Keeping your tires properly inflated is crucial for a smooth and safe ride. Whether you prefer a manual pump or a CO2 inflator, both are excellent choices for fixing flats on the trail.
Manual Pumps
Manual pumps are a reliable option for reinflating tires after a flat. They’re lightweight, compact, and can easily fit in your hydration pack or attach to your bike frame. To use, apply steady, controlled strokes to build pressure. Periodically check the tire pressure to ensure you’re inflating it to the right level.
CO2 Inflators
CO2 inflators are the go-to for quick tire inflation. These handy devices use small cartridges to deliver a burst of gas, rapidly filling your tire. To use, securely attach the inflator to the valve and release the gas slowly to avoid over-inflating. It’s a smart idea to carry an extra cartridge as a backup.
Tips for Trailside Repairs
- Use slow, consistent strokes with a manual pump and check the pressure frequently.
- Secure CO2 inflators tightly to the valve and release gas gradually.
- Carry both a manual pump for steady inflation and a CO2 inflator for quick fixes.
Up next: Learn how tubeless repair kits can work alongside these inflation tools.
4. Tubeless Repair Kit
A tubeless repair kit is a must-have for handling punctures and small cuts while you’re out on the trail. These kits are compact and come with tools specifically made to quickly seal up tire damage.
What’s Inside
A good tubeless repair kit typically includes:
- Tire plugs: Rubber plugs designed to seal punctures
- Insertion tool: A tool with a forked end to push plugs into the tire
- Reamer (or rasp tool): Prepares the puncture site for the plug
- Sealant: A small bottle (usually 2 oz) of tire sealant
How to Use It
Here’s how to repair a puncture:
- Find the puncture and clean the area around it.
- Use the reamer to prepare the hole for the plug.
- Insert the plug with the tool, leaving a bit sticking out on either side.
- Trim any excess plug, then reinflate the tire to the proper pressure.
Helpful Tips
- Pack extra tire plugs in case you need more than one.
- Always check your sealant levels before heading out for a long ride.
- Practice using your kit at home so you’re ready when it counts.
- Store the kit in a dry, secure spot to keep everything in good condition.
Mistakes to Watch Out For
- Don’t remove the tire from the rim – it’s unnecessary for most repairs.
- Avoid using too much force when inserting plugs; it could damage the tire.
- Always ream the hole first. Skipping this step can lead to poor plug adhesion.
- If the repair feels unstable or the tire keeps losing air, don’t ride on it. Fix it properly before continuing.
5. Chain Repair Tools
A broken chain can bring your ride to an abrupt halt. To avoid getting stranded, carry a chain repair kit to handle any link issues on the spot.
What to Include
Here’s what your chain repair kit needs:
- Multi-tool with a chain breaker: This tool is essential for safely removing or adjusting chain pins.
- Quick links: Always have at least one spare quick link for fast and easy chain reassembly.
These tools, combined with your multi-tool, will help you handle chain issues efficiently.
How to Use Your Chain Tool
Here’s a quick guide to repairing your chain:
-
Removing a Damaged Link
Position the chain so the pin aligns with the tool’s channel. Push the pin partially out to make reassembly easier. -
Installing a Quick Link
Insert the quick link to reconnect the chain. Once installed, check that the chain moves smoothly without any snags. -
Fixing Stiff Links
Flex the chain to identify any stiff links. If you find one, loosen it by hand or with your tool.
With these simple steps, you’ll be back on the trail in no time.
6. Emergency Fasteners
When you’re out on the trail and something goes wrong, having the right fasteners can mean the difference between riding back or walking your bike. These simple tools provide quick, temporary fixes to secure loose parts until you can handle proper repairs.
Essential Emergency Fasteners
Heavy-Duty Zip Ties
- Pack a few sturdy, outdoor-grade zip ties in your kit.
- Use them to secure components or hold makeshift repairs together.
Durable Duct Tape
- Keep a small roll of tough, weather-resistant duct tape handy.
- It’s perfect for patching or temporarily securing parts that need a quick fix.
Getting familiar with these fasteners ahead of time will make it easier to deal with unexpected problems on the trail.
Practical Uses
- Hold loose cables in place or stabilize a cracked frame temporarily.
- Reattach fenders, mudguards, or other accessories that come loose.
- Steady components until you can make a proper repair.
Handy Tips
Store fasteners in a sealed plastic bag to keep them dry and ready to use. These fixes are designed to get you back home safely, so always plan for a full repair as soon as possible.
What They Can’t Do
Emergency fasteners are not a permanent solution. They’re not suitable for major structural damage or anything requiring long-term stability. Think of them as a backup to help you finish your ride safely.
sbb-itb-9d75ae1
7. Basic Wrench Kit
A compact wrench kit is a must-have for quick fixes like tightening bolts or making adjustments while on the trail. It’s small enough to fit in your bike bag or hydration pack, yet packed with tools for common bike repairs.
Key Wrenches to Include
Allen (Hex) Wrenches
Make sure your kit includes 4mm, 5mm, and 6mm Allen wrenches – they’ll cover most bolt sizes on your bike.
Torx Wrenches
Add T25 and T30 Torx wrenches for compatibility with a broader range of components.
A well-rounded kit with these tools ensures you’re ready for on-the-spot adjustments, keeping your ride smooth and stress-free.
8. Basic Medical Kit
Taking care of minor injuries on the trail is just as important as fixing your bike. Cuts, scrapes, and blisters can happen, and having a small, well-organized medical kit can make a big difference.
What to Pack
Here are a few essentials to include in your kit:
- Wound care items: Adhesive bandages, gauze, and antiseptic wipes to clean and protect injuries.
- Pain relievers: Over-the-counter options to ease discomfort while riding.
- Personal medications: Don’t forget any prescription meds you might need.
Packing Tips
Keep your medical kit in a waterproof pouch that fits in your jersey pocket or bike bag. Make it a habit to check for expired items and replace them as needed.
Stay prepared and ready for both bike repairs and first aid situations with the right tools and knowledge. For more tips, visit Intermountain Bikes.
9. Safety Devices
Having the right safety gear is just as important as carrying repair tools, especially when you’re far from help. Here’s a closer look at tools and tips to keep you safe during off-grid adventures.
GPS Navigation Tools
Trail-specific GPS devices are a must. They help you stay on course, retrace your steps if needed, and explore unfamiliar areas without fear of losing your way.
Emergency Communication
Personal locator beacons (PLBs) are lifesavers when you’re out of cell service range. They connect you directly to emergency services, giving you a reliable way to call for help in critical situations.
Tips for Staying Prepared
- Keep your safety devices within easy reach while riding.
- Make sure all devices are fully charged before heading out.
- Register your PLB and keep your emergency contact details up to date.
- Take time to understand how each device works before you hit the trail.
10. Spare Hanger
A derailleur hanger might be small, but it plays a big role in protecting your bike’s frame and derailleur. Made from soft aluminum, these replaceable parts are designed to bend or break during impacts, saving you from more expensive repairs. While a spare hanger typically costs $10–$30, riding with a damaged one can lead to over $150 in replacement parts and repairs.
A 2023 International Mountain Bicycling Association survey found that 23% of trailside mechanical issues involve bent or broken hangers.
"A ‘repaired’ hanger has 40% less structural integrity and often fails catastrophically mid-ride", says Calvin Jones, Senior Education Manager at Park Tool.
Compatibility Is Key
With over 400 different hanger designs across brands, finding the right one for your bike is essential. For example, a 2024 Trek Fuel EX uses hanger #W527423, while a Specialized Stumpjumper needs #S198800004. To ensure a perfect match, use Wheels Manufacturing‘s online database to identify the correct model for your bike.
Storage Tips
Weighing only 1.2–2.5 oz, a spare hanger is easy to add to your repair kit. To keep it in good condition, store it in a silicone-impregnated bag to prevent corrosion. This is especially important since 17% of hanger failures at the 2025 Sea Otter Classic repair tent were caused by seized bolts. Proper storage ensures your spare hanger is ready to go when you need it.
Installation Essentials
To replace the hanger, you’ll need a 4mm or 5mm hex wrench, which is usually included in a multi-tool. Applying anti-seize compound to the threads makes the installation smoother and more secure.
Emergency Backup
For extra peace of mind on remote trails, consider carrying both a model-specific hanger and a universal emergency option like the Problem Solvers Universal Derailleur Hanger ($19.99). The universal hanger can serve as a quick fix to get you back on the trail.
A spare derailleur hanger is a simple, low-cost addition to your repair kit that can save you from expensive damages and keep your ride uninterrupted.
Tool Quick Reference
Here’s a quick comparison of essential tools to help you decide what to include in your repair kit:
| Tool | Weight | Durability | Ease of Use | Compatibility |
|---|---|---|---|---|
| Basic Tire Patch Kit | 2.5 oz | High | Moderate | Universal |
| Multi-Tool w/ Chain Tool | 8.4 oz | Very High | High | Most bikes |
| Portable Tire Pump | 5.8 oz | High | High | All valve types |
| Tubeless Repair Kit | 3.2 oz | High | Moderate | Tubeless only |
| Chain Repair Tools | 4.1 oz | Very High | Moderate | Chain-specific |
| Emergency Fasteners | 1.8 oz | High | High | Universal |
| Basic Wrench Kit | 6.7 oz | Very High | High | Most bikes |
| Basic Medical Kit | 4.9 oz | Moderate | High | N/A |
| Safety Devices | 3.3 oz | High | High | Universal |
| Spare Hanger | 1.2–2.5 oz | High | Moderate | Model-specific |
The entire kit weighs about 2.6–2.7 lbs, making it manageable for carrying on the trail.
Material Tips
Opt for chromoly steel tools with corrosion-resistant coatings. These materials hold up well in harsh conditions and extend the lifespan of your gear.
Storage Advice
Keep your tools organized and protected by using a roll-up tool wrap or a dedicated organizer. This not only prevents damage but also makes it easier to access what you need quickly.
Compatibility Reminders
Double-check that your chain tool works with your drivetrain speed and that your tire repair tools align with your bike’s setup. Some parts, like derailleur hangers, are specific to certain models, so plan accordingly.
Summary
Having the right tools can stop minor problems from turning into big issues on the trail. A well-stocked repair kit helps you handle common mishaps – like flat tires or a broken chain – so you can keep riding. Just as important is knowing how to use those tools to make quick, safe fixes. For more repair tips and guides, check out Intermountain Bikes.
Here are a few tips to ensure your repair kit is ready for every ride:
- Use a waterproof container to protect your tools.
- Inspect your tools regularly to ensure they’re in good condition.
- Replace any damaged items as soon as possible.
- Consider taking a basic bike maintenance course to boost your repair skills.
FAQs
What are the must-have tools for fixing your bike on the trail?
When you’re out on the trail, having the right tools can make the difference between finishing your ride or walking your bike back. Here are 10 essential tools every mountain biker should carry:
- Multi-tool with hex keys, screwdrivers, and a chain breaker.
- Spare tube or patch kit for flat tires.
- Tire levers to remove and replace tires easily.
- Mini pump or CO2 inflator for inflating tires.
- Chain lube to keep your drivetrain running smoothly.
- Quick links for emergency chain fixes.
- Portable torque wrench to tighten bolts to the correct specs.
- Spoke wrench for quick wheel truing.
- Duct tape or zip ties for temporary fixes.
- Small first aid kit for minor injuries.
Carrying these tools ensures you’re prepared for common mechanical issues and can keep your ride going smoothly. Always check your gear before heading out to make sure everything is in good condition and ready to use.
How can I make sure the tools I carry work with my bike?
To ensure your tools are compatible with your bike, start by checking your bike’s specifications and components, such as the type of bolts, chain, and tire valves it uses. Match these details with the tools you plan to carry. For example, if your bike has hex bolts, make sure to include the correct hex wrenches in your kit.
It’s also a good idea to test your tools at home before hitting the trails. Practice common repairs, like fixing a flat or adjusting your brakes, to confirm that your tools fit properly and work efficiently. This preparation can save you from frustration during an actual breakdown on the trail.
How can I practice using trail repair tools to be prepared for emergencies?
Becoming proficient with your trail repair tools is important for handling emergencies confidently. Start by familiarizing yourself with each tool in your kit and understanding its purpose. Practice common repairs, like fixing a flat tire, adjusting brakes, or replacing a chain link, in a controlled environment like your garage or backyard.
To build confidence, simulate real-world scenarios. For example, time yourself repairing a flat or making adjustments as if you were on the trail. Watching tutorials or reading guides can also help you refine your technique. With regular practice, you’ll feel more prepared to tackle unexpected mechanical issues while riding.


